Posted by Emily Midgett
on December 14, 2022

Hi there! Emily Midgett here with you today, and I have some fun inspiration to share using several of the new products from the December My Monthly Hero release. We are shooting for the stars this month, and one of my favorite ways to use space-themed products is to create a watercolored galaxy filled with spots of vibrant color amidst the blackness of space. The new Twinkling Stars Hot Foil Plate was the perfect celestial backdrop for a rocket ship shooting into a galaxy of color! Let's get started with the details.

I began by my project by hot foiling the new Twinkling Stars Hot Foil Plate onto some watercolor paper using silver hot foil. If you haven't tried hot foil on watercolor paper, here's your permission slip to do so. It creates a beautiful letterpress look, and watercoloring with it is so much fun. The hot foil behaves similarly to emboss-resist technique, and the look is so unique and fun! After taping down my hot foiled panel to my watercolor board, I created a rainbow galaxy background using some Daniel Smith paints, swiping diagonal strips of color across my hot foiled card base and blending them together with my damp paintbrush. Once my watercolored rainbow was complete, I added Black Liquid Watercolor around the perimeter of my watercolored, hot foiled panel, pulling that color out with a clean damp brush to allow the colors the pop through the black outline. I allowed the panel to dry while still taped to my watercolor board to minimize warping.

Next, I assembled the Space Rocket Fancy Die. I die cut the main part of the die from some Granite cardstock, cutting the fiery tail from Mustard and Pumpkin cardstocks and the puff of smoke from vellum. I think this one would be super fun to color with your favorite coloring medium, but flowers are more my forte, so I let the colored cardstock do the work for me! So quick and easy.

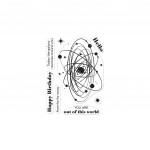
Once I'd finished die cutting and watercoloring, I decided to cut a glittery black frame using some black Glitter Basics cardstock and the Space Window die. I popped it up on the watercolored background using foam tape, then adhered the rocket ship to the center of the card with some more foam adhesive. For the greeting, I white embossed a couple of sentiments from the new Orbit stamp set onto some Pitch Black cardstock strips.
Well, that's all for this project! The dramatic black glitter frame with the rainbow background was a great accompaniment to the rocket ship. I love when so many products work so seamlessly together. Thanks so much for stopping by today, and have a marvelous day!

|