Creating A Scene with Smaller Images - Hero Arts
Posted by Michelle Short on September 22, 2020

Creating A Scene with Smaller Images

Hello there, Michelle here and today I have a card to share with you using the Wheelbarrow Friends set. Since a lot of the images are small, sometimes it can be tricky to create scenes, but I wanted to show you that you can still create mini scenes for your cards using smaller images.

Well Hello There by Michelle Short for Hero Arts

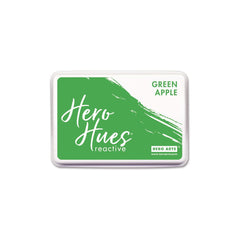
I started off by creating a background for my scene. Since the images are small, I wanted to contain the scene in a smaller way. I masked off the edges of a panel of a panel of Dove White Cardstock and then blended inks inside. Using a blending brush, I first blended on Splash Reactive Ink for the sky, working my way from the top and getting lighter towards the bottom. I then used Key Lime Fizz and Green Apple Reactive Inks for the grass at the bottom.

Well Hello There by Michelle Short for Hero Arts

The masking tape was removed and the sentiment from the Wheelbarrow Friends set was stamped in the top left hand corner with Intens-ified Black Ink. I took the images from the set and stamped them on to white cardstock using Intens-ified Black Ink. They were coloured using Copic Markers and die cut out using the Wheelbarrow Friends Frame Cuts.

Well Hello There by Michelle Short for Hero Arts

The panel was adhered flat to a side folding card base and then the images added on top with a combination of foam tape and Precision Glue. To finish off, I added a few Clear Enamel Dots.

Thank you so much for stopping by today. Take care and happy crafting!

Click on products to shop:
CM477 Wheelbarrow Friends - Hero Arts
HA ]
DI813 Wheelbarrow Friends Frame Cuts...
HA ]
AF428 Splash Reactive Ink - Hero Arts
HA ]
AF424 Key Lime Fizz Reactive Ink -...
HA ]
AF425 Green Apple Reactive Ink - Hero...
HA ]
AF435 Intens-ified Black Ink Pad -...
HA ]
GW101 Precision Glue - Hero Arts
HA ]
CH321 Clear Hero Hues Enamel Dots -...
HA ]
PS325 Hero Hues Dove white - Hero Arts
HA ]
PS406 Hero Hues Dove White Side...
HA ]

Leave a comment

Your email will not be published. Please note, comments need to be approved before they are published.

2 comments

KC Wong,

Love this idea! I’ll need to comb through my stamp sets (especially MMH Kits! They have lots of cool stamps) and see what I can do!!!

Cindy C.,

How sweet!!


  • CLEAN & SIMPLE CHRISTMAS CARD WITH FROSTY SKATES, S5-1566, BP-393, S4-1292

    BP-393

    Clean and Simple Christmas Card with Frosty Skates

    Give the Frank Garcia Christmas Blush Collection a contemporary twist with this clean and simple Christmas card. Learn how to assemble pastel ice skates, add winter foliage, and finish the design with a hot-foiled sentiment and silver gems.

  • How to Create a Sweet Snowman Christmas Card with Unexpected Colors

    BP-393

    How to Create a Sweet Snowman Christmas Card with Unexpected Colors

    Create a whimsical Christmas card with the Sweet Snowman Etched Dies from Frank Garcia’s Christmas Blush Collection. Follow the step-by-step tutorial to assemble the snowman, hot foil a festive sentiment, and add sparkle to an embossed background.

  • How to Create a Sparkling Christmas Card with Beautiful Layers

    BP-001

    How to Create a Sparkling Christmas Card with Beautiful Layers

    Create a sweet and sparkling Christmas card featuring the Frank Garcia Christmas Blush Collection. Learn how to combine an embossed tree, glittery snow, a charming die-cut snowman, patterned papers, and lace for a beautifully layered holiday design.