


Posted by Hero Arts
on June 12, 2021

Today's post introduces the latest challenge from our friends over at A Blog Named Hero. We are so thankful for the support they give us, and the beautiful creations the team creates. If you're looking for a fun challenge to play along with, check them out! Today team member, Essie, is sharing a project for their June challenge and it is gorgeous!

Hello Crafty Friends! I'm Essie from the design team at A Blog Named Hero and I'm delighted to join Hero Arts today to share a card I've made for this month's Monochrome Challenge on A Blog Named Hero.
Monochrome cards are easy and there are a lot of ways to play with that theme: Use a single color on a background (think black on white, white on blue) or tones of a single color (think ombre). If you generally use a LOT of color on a single card (I do!), going monochrome can be challenging, but also freeing. I discovered that, with color questions eliminated, I was able to really focus on layout, texture/materials, and dimension.
Today's card is a no-coloring creation of blue, blue, and more blue--with enough white for a clean and simple vibe.
Monochrome cards are easy and there are a lot of ways to play with that theme: Use a single color on a background (think black on white, white on blue) or tones of a single color (think ombre). If you generally use a LOT of color on a single card (I do!), going monochrome can be challenging, but also freeing. I discovered that, with color questions eliminated, I was able to really focus on layout, texture/materials, and dimension.
Today's card is a no-coloring creation of blue, blue, and more blue--with enough white for a clean and simple vibe.

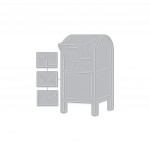
I love card making supplies that help illustrate my love for snail mail - so the US Mailbox Fancy Die with its three tiny pieces of mail (two kinds of envelopes and a postcard) was an easy pick for me. Each piece of mail and the mail box are actually three die cut layers of heavy white card stock glued together. For the mailbox, I blended two shades of blue ink and then sprayed White Iridescent Shimmer Mist to add shine and interest.

I made the marbled blue background using an oldy-but-goody technique with shaving cream and reinkers. The technique is so easy and inexpensive that I made plenty of pieces for future cards. (It's also a great craft to do with young crafters!) In case this is something you don't recall doing, I've added a very short YouTube video to demonstrate how to make marbled cardstock.

I created a floor for the mailbox by masking off the bottom of the marbled panel and ink blending it dark blue. After gluing the background panel to a white A2 card, I lined up the envelopes, making sure the spacing was equal between each one. Using a grid craft mat and a T-ruler really helped! I used foam dots to pop up the envelopes - they made it easy to reposition the pieces of mail when my spacing wasn't perfect. I placed the mailbox in the center of the bottom of the card and used double thick foam dots behind it. Those doubled foam dots really amped up the dimension and interest. I added a little silver handle and "lock" to the box for a little extra fun. Finally, I stamped and cut the "Hello Friend" sentiment from Sending Love Mail, added it below the mailbox, and my card was finished.

I hope you'll play along with our Monochrome Challenge, which is so generously sponsored by Hero Arts. It's easy, just link your creations to A Blog Named Hero to enter the fun and have a chance to win one of two monthly prizes from Hero Arts.
Thanks so much for stopping by!
Essie from A Blog Named Hero
Thanks so much for stopping by!
Essie from A Blog Named Hero
Click on products to shop:
|























































































4 comments
So thrilled to see my card here—and such nice blog compliments, too! Thanks, Hero Arts—for the constant inspiration and for the chance to be participate in the creative joy of your blog.
Gorgeous card and great idea to use an old technique to make those beautiful backgrounds.
Thank you so much for sharing, stay safe and have a wonderful day.
Love it, Essie! The floaty background makes it look like the letters are flying!
Oh what a fun technique! I haven’t don’t this is years and you have inspired me to revisit it. I love the mailbox card so much and how you used the envelopes on the background.