


Posted by Yana Smakula
on February 17, 2020

Hello, Hero Arts fans! Welcome back for another episode of the Color Layering video series!

In this video and episode, we are taking a closer look at the new Tulip Field HeroScape set.
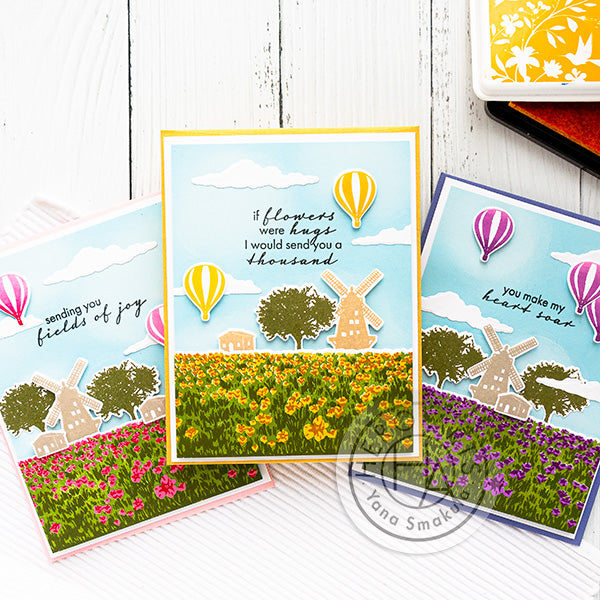
If you aren’t familiar with these stamps, there are 3 sets in the line, the Lavender Field, the Tulip Field, and the Sunflower Field. All are large 6x8 clear stamps that have a beautiful layering to create a blooming field of either lavender, tulips or sunflowers.
I was blown away by these stamps and by how easy it was to use them to make absolutely stunning cards. If you like to create little scenes on your projects - these stamps are for you, and I suggest you get all 3 sets because then you’ll be able to mix and match the little accents from the sets.
Watch the video tutorial below to learn how I made the cards I'm sharing today.
If you’re having a problem viewing this video, please try watching it HERE in HD on YouTube.
This stamp set is very easy to use, all you need is 4 colors of ink - 2 for the grass and 2 for the flowers. I used my mini MISTI stamping tool to stamp several blooming tulip fields, in different ink colors, to make 3 cards.
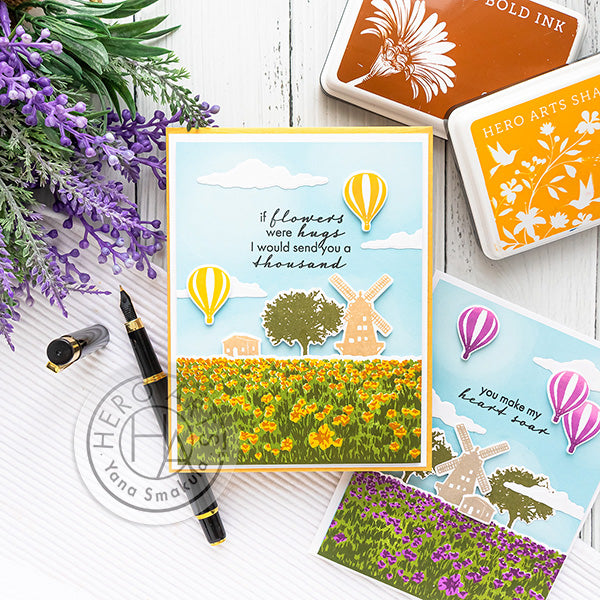
It’s easy to stamp multiple images when using these stamps. I used Moss ink for the solid grass layer and Forever Green for the detail grass layer. To stamp flowers, I used several ink color combinations. Butter Bar and Caramel for the yellow tulips:
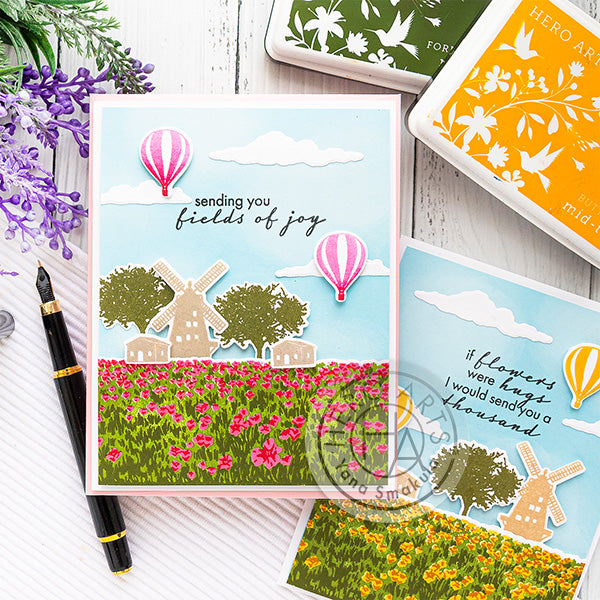
Bubble Gum and Crimson to stamp the pink tulips:
And finally Orchid and Grape Juice to stamp the purple tulips:
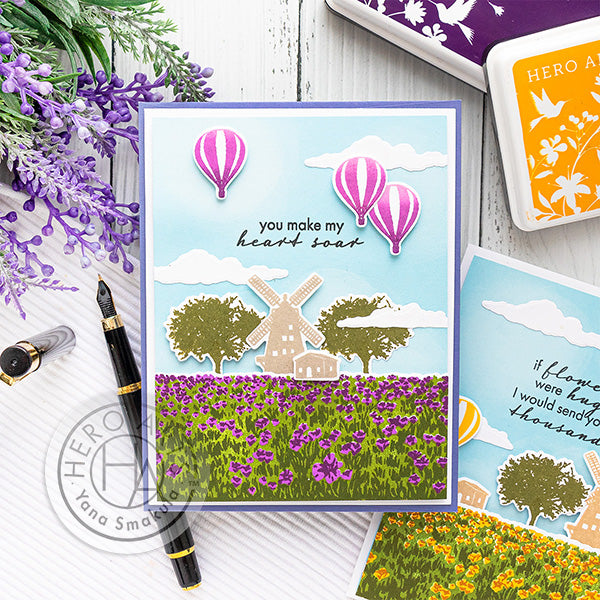
Once all my panels were stamped I stamped a few additional pieces for my cards - several trees in Forever Green ink, windmills in Wet Cement and Soft Brown and hot air balloons in various ombre ink pad colors. I used coordinating dies to cut these images out.
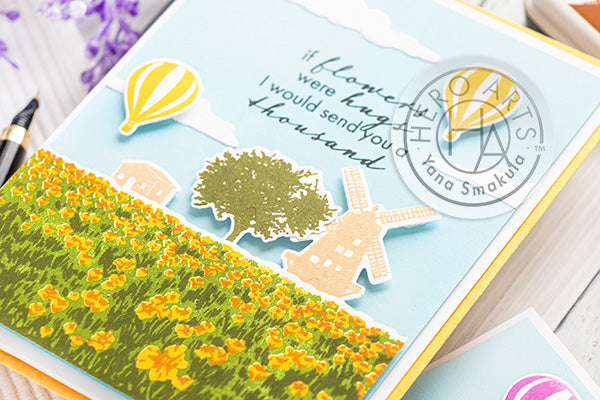
With all of my images cut out, I trimmed the blooming fields down slightly to measure 4” wide. I added a generous layer of foam adhesive tape to the back of each of the blooming fields and set them aside to make a sky for my cards. For this I used a panel of Mist cardstock, cut to 4 x 5 1/4” and ink blended white pigment ink, Unicorn White, over it to mimic clouds.
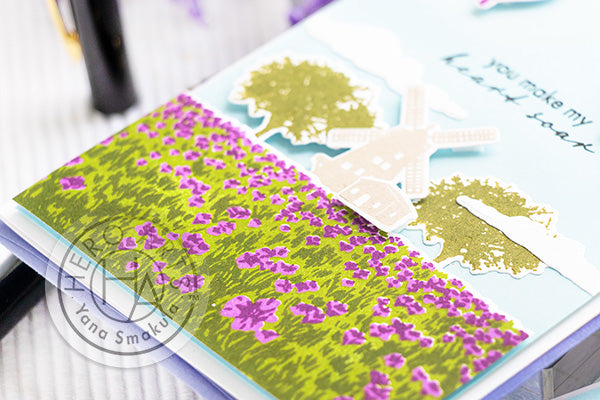
I blended the white ink where the blooming field ends to make it look like to horizon is very cloudy and also added some faint clouds to the top of the panel to soften this panel up. With the ink blending done I stamped sentiments. I used sentiments that come with the Tulip Field stamp set and stamped them in black ink directly onto the panel, in the center.
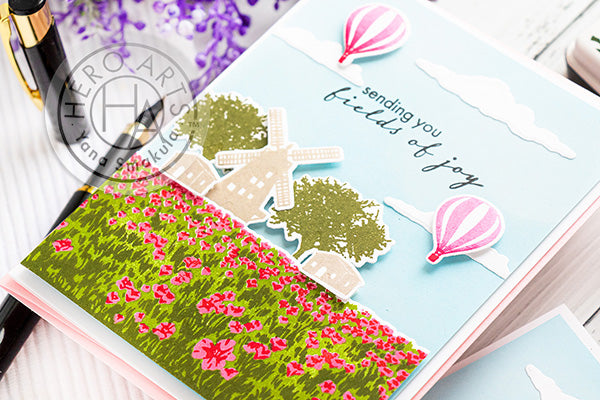
The sentiments for my cards read "If Flowers Were Hugs I Would Send You A Thousand", "Wishing You Fields of Joy" and "You Make My Heart Soar". Next, I used a mix of foam adhesive and glue to assemble my cards.
Have fun stamping!























































































23 comments
Gorgeous Yana. I have to have 1 or 2 of these maybe all 3, results are lovely, I’m not a scene maker yet, new to crafting, this does the job for me. Whooooopeee!
Love these new stamp sets and how they look on cards! Beautiful. Thanks for sharing your video!!
I absolutely love these stamps!!!
I saw these demonstrated with a video at creative Nation. I want these dies and stamps. They look so good and I really like all the Hero Arts Stamps and dies that I have.
Mike
I love this set!