


Posted by Daniel West
on April 16, 2021

Hey there friends, Daniel, here with a fun spotlight technique featuring the Forest Shapes Bold Prints. Sometimes, I feel overwhelmed with a large amount of open spaces on a background stamp. What if I color the whole thing in and make a mistake on a section of it? What if I don't have time to color it in completely because I just learned I needed a card? What if I just LOVE the spotlight technique?
These are great reasons to use this partial coloring method. I showed you how I did this during the Tuesday episode of Live with Libby (where I was Libby for a day). You can watch the replay for details.

Check out the video for tips on choosing Copic markers and palettes! I mention a wonderful tool that will change your palette game.

Now, for today's card, I did a variation of the first card, taking a strip I trimmed off the original panel I created in the video and coloring it in. I moved my card base a bit to the right in my MISTI in order to have some real estate to the right of my colored panel. I stamped the Forest Shapes Bold Prints with Intensified Black Ink. Then, I cut down an A2-sized panel of Classic Layering Vellum and ran it through my Xyron Creative Station Lite to add even adhesive to the back. Then, I laid it over my stamped card base of Dove White cardstock.
Next, I colored in the strip of the Forest Shapes Bold Prints with Copic markers using this color palette: CG10, CG8, BG49, BG18, BG15, R29, R27, R24, YR68 and YR65.
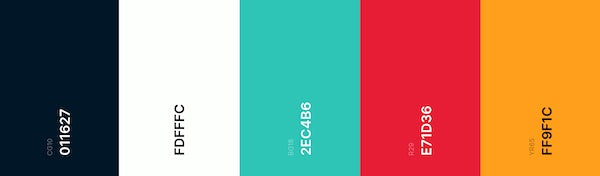
After coloring the strip, I adhered it directly over the vellum with Hero Arts Precision Glue. I made sure to align the prints up. Then, I created a sentiment strip with a great stamp from the Line Art Flowers Stamp Set, some Embossing and Watermark Clear Ink and White Embossing Powder over Pitch Black cardstock.
I popped up the strip with some foam tape over the colored strip. Then, I finished off the card with some Hero Hues Black Enamel Dots.

Thank you so much for joining me today. I hope you enjoyed this spotlight technique as much as I did. Below you will find a grid of supplies for your convenience! Let me know what your favorite colorable Bold Prints stamp is in the comments.
Kindly,

|

























































































8 comments
Like the partial coloring because I would mess up on coloring such a big print. Finished a card using Soft Landscape Window die that I’ll post to my blog today.
Melissa
“Sunshine HoneyBee”
I love your card. What an inspiration to use part of the background die and color it with beautiful colors. Thank you so much for sharing.
I just received this bold print in the mail, and have only used it as a tone on tone background. I love your design. I love the design of this months kit, because I don’t have anything like it. I will definitely try your technique. Thank you for sharing it.