Happy Labor Day, crafty friends! Our offices are closed on Monday, Sept. 7. Support returns Tuesday, Sept. 8. Until then, stay crafty!
20% off Sitewide*
20% off Sitewide*
20% off Sitewide*
20% off Sitewide*
20% off Sitewide*
20% off Sitewide*
20% off Sitewide*
20% off Sitewide*
20% off Sitewide*
20% off Sitewide*
Item added to your cart
Shop by
Posted by Spellbinders Team on February 02, 2018
Video Friday | Stenciled Scene Shaker Backgrounds
Hello everyone. This is
Nichol Spohr
and thank you for joining me! Today I’m sharing how to layer stencils to create a seasonal background scene for a die cut image. I’m layering inking and stenciling with embossing paste and stencils and finishing it all with an interactive shaker element!
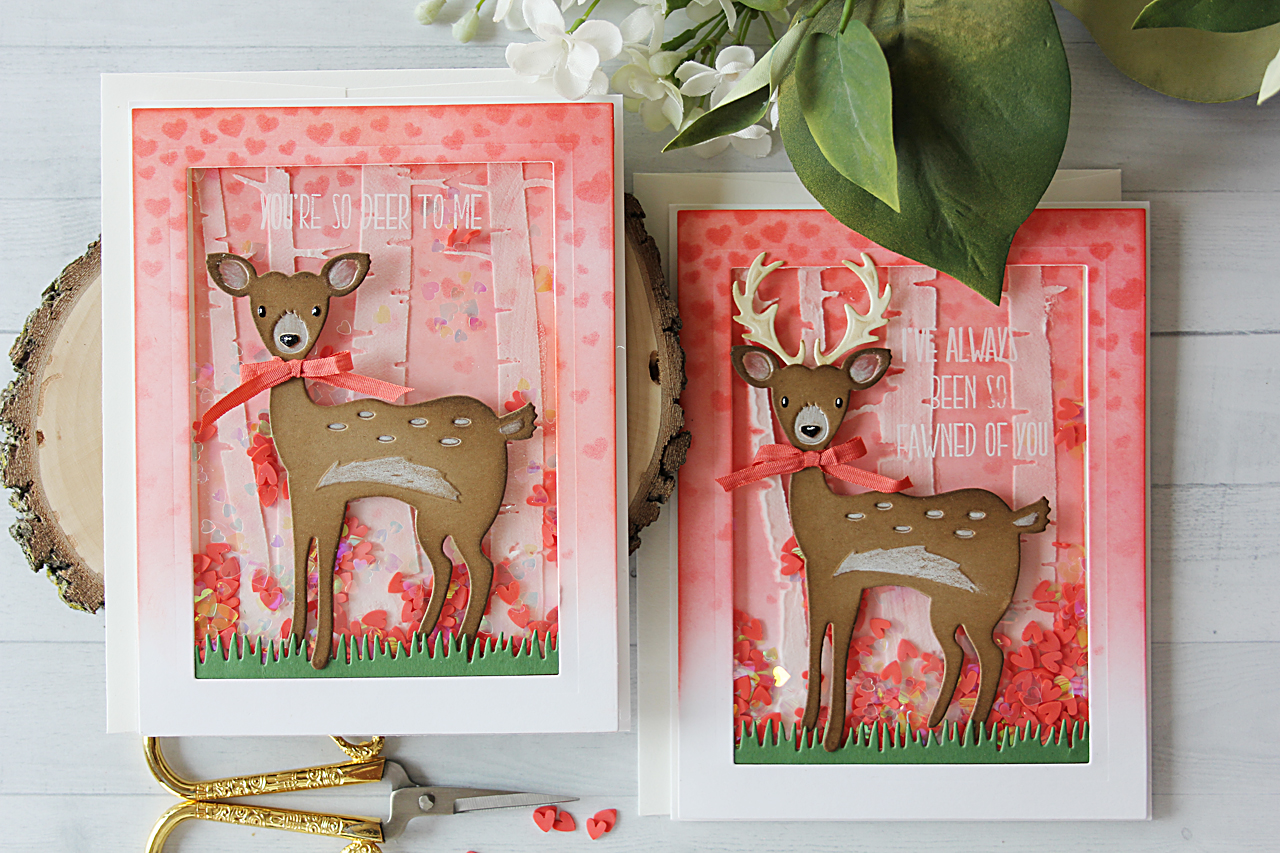
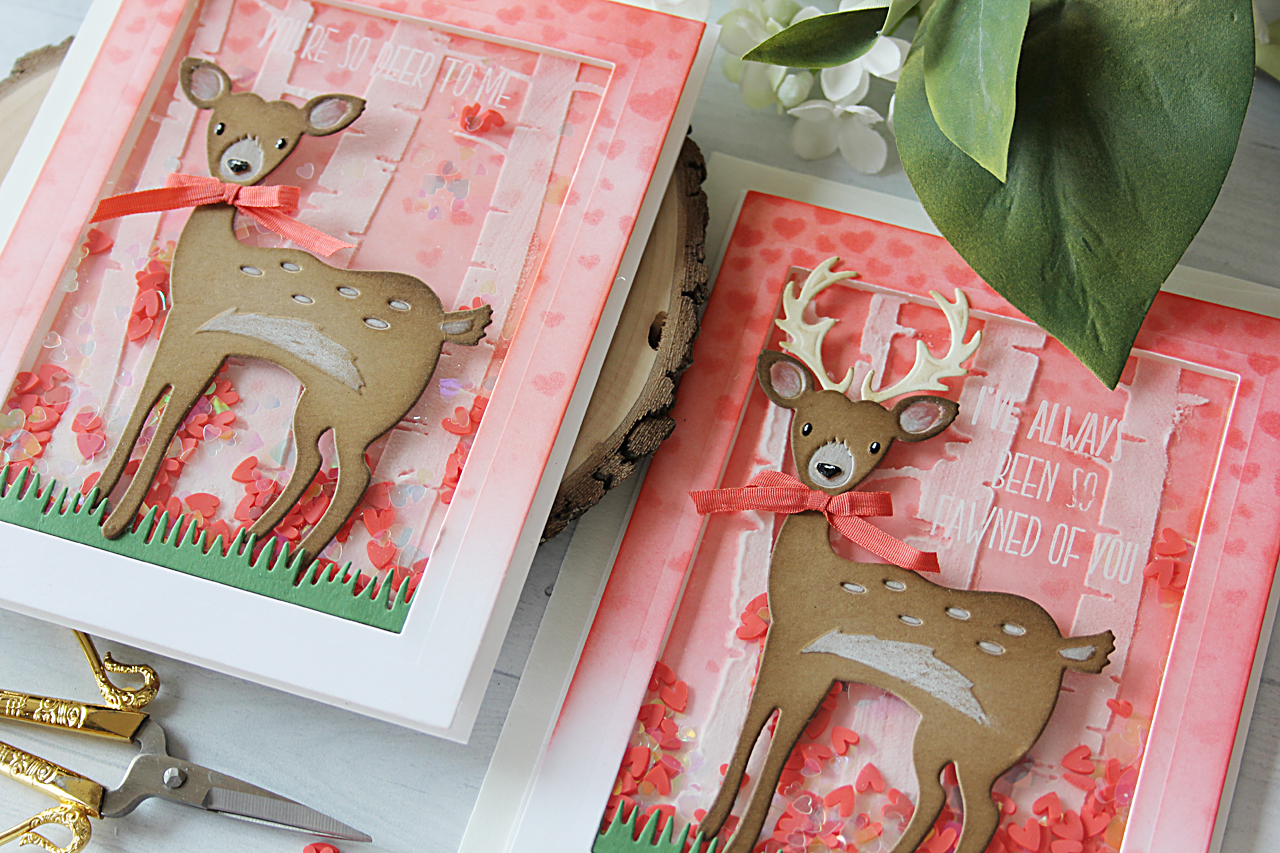
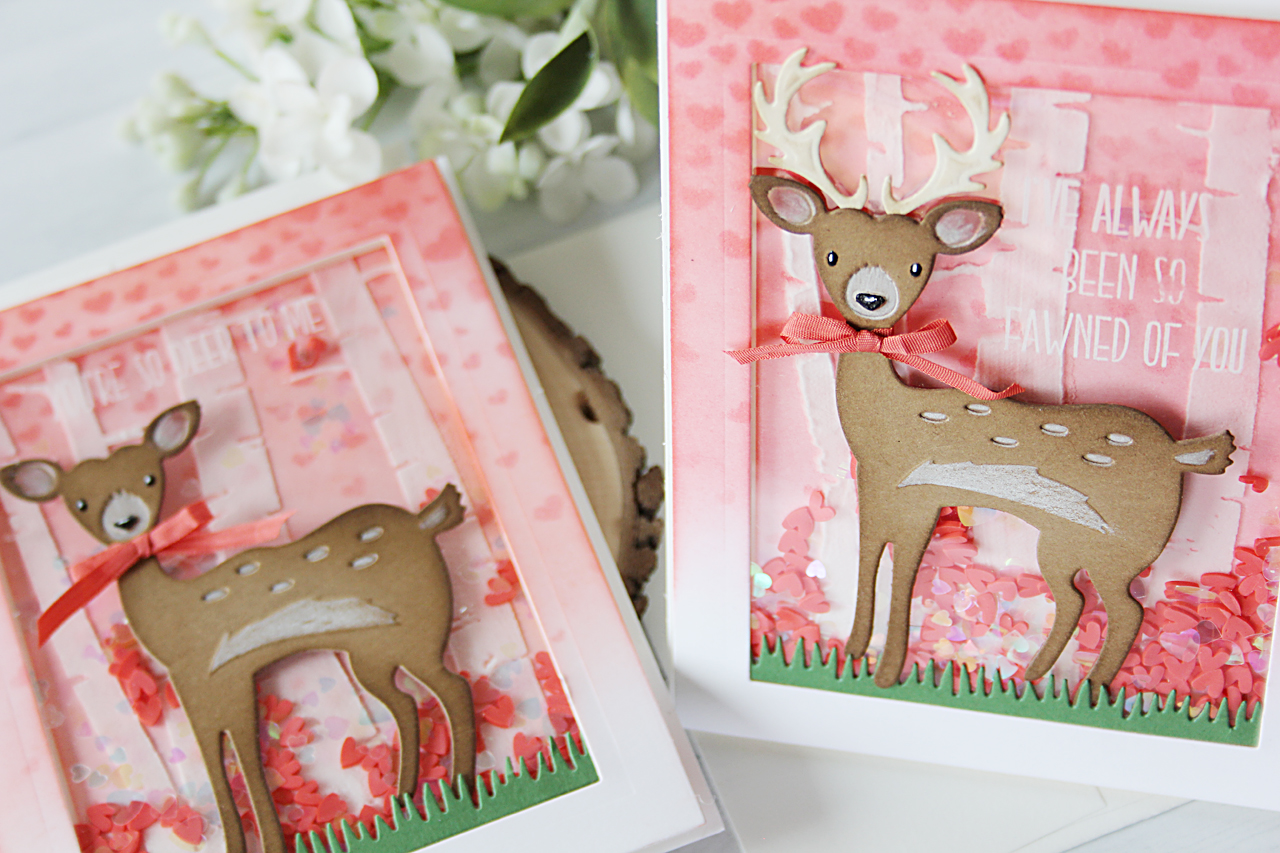
Creating a scene card is one of my very favorite styles of card to create. The

Deer dies
are the perfect focal point of these love-themed shaker cards. The grass die from the
Picket Fence set
gives the deer something to stand in and the
Pierced Rectangles
make a great frame and shaker background.
For the background of both cards, I used the
Pierced Rectangles
to die cut a background and frame for my scene card. I inked the background up with Spun Sugar Distress Ink and then stenciled over the inked background with Candied Apple Distress Ink and a hearts stencil. I inked over the stenciling with Candied Apple Distress Ink to soften the look and not have so much contrast.
Trees were stenciled over the heart backgrounds using white embossing paste. I set the backgrounds aside to air dry while working on the rest of the design.
The
Deer dies
were die cut and embossed from brown cardstock and the antlers from ivory cardstock. The deer were inked with Gathered Twigs Distress Ink along the edges and colored pencils were used to add detail to the deer. A black pen was used for the eyes and noses to really make them pop.
Ribbon was tied into a bow around both of the necks.
The background panel was adhered directly to a white top fold card base and framed with two layers of foam adhesive to create a well for the shaker cards. The shaker was filled with red and iridescent heart confetti.
Grass was die cut from green cardstock using the
Picket Fence dies
.
Greetings were stamped on a transparency using white StazOn Ink and the transparency was adhered to the back of the frame.
The grass image was placed along the bottom edge of the frame and the deer adhered to look like it is standing in the grass. The backing paper was removed from the foam tape and the frame was secured in place.
VIDEO TUTORIAL
Watch video tutorial below or on
Youtube
to learn how to make this project:
Cardstock: Neenah Solar White 110 lb cardstock, Lawn Fawn Noble Fir cardstock, Lawn Fawn Paper Bag cardstock, Lawn Fawn Vanilla Malt cardstock, Judikins Embossable Plastic; Stenicils: Honey Bee Stamps Outdoor Scene Builder, Fall Showers Stencils; Simon Says Stamp So Deer Stamp Set; Tsukineko Cotton White Staz-On Ink; Faber Castel Polychromos colored pencils; Ranger Distress Ink in Spun Sugar, and Candied Apple; Sakura black and white gel pens; Embossing Paste: Studio 490 Wendy Vechi White Embossing Paste; Adhesive: Scotch Foam Tape, Ranger Multi Matte Medium; ribbon; Confetti: Honey Bee Stamps Little Love Heart Sequins, Kiss Me Candy Hearts
I hope this has given you a few ideas on how to create a background stenciled and shaker scene for your die cut images. Thank you so much for joining me today and I hope you’ll join me again next month for another video tutorial!
Share this article
2 comments
I love both of the cards they are very pretty, I wanted to buy this die but did not think that after I cut it looked good. After seeing how you cut it and colored it, I just love It, needless to say, I will get it. Thank you for the tutorial.
Great cards, Nichol. Love the color. The deer is awesome as is the grassy border die you used. I love how short the grass is as most grassy border dies are much longer and don’t always work for some designs. Thanks for sharing.
Hi, crafty friends! Lisa Tilson here, and I'm delighted to be with you today sharing a fun interactive birthday card featuring the new Spellbinders Card Spinners. If you've ever wanted to add movement to your handmade cards without complicated mechanisms, these spinners make it incredibly easy! For today's project, I'm using the Large Card Spinner to create an adorable birthday monster that spins with just a...
Turn layered scalloped frames into a colorful Halloween gallery wall! This step-by-step tutorial shows how to emboss and arrange the Scalloped Frames, assemble the adorable Drac character from Simon Hurley's Halloween Hugs Collection, and create a playful handmade Halloween card full of dimension and color.
Celebrate treasured memories with a handmade vintage journal featuring interactive pages, pockets, vintage photos, and layered embellishments. This step-by-step tutorial showcases creative ideas for building meaningful double-page spreads with Esther Glas' Turn the Page collection.
2 comments
I love both of the cards they are very pretty, I wanted to buy this die but did not think that after I cut it looked good. After seeing how you cut it and colored it, I just love It, needless to say, I will get it. Thank you for the tutorial.
Great cards, Nichol. Love the color. The deer is awesome as is the grassy border die you used. I love how short the grass is as most grassy border dies are much longer and don’t always work for some designs. Thanks for sharing.