Happy Labor Day, crafty friends! Our offices are closed on Monday, Sept. 7. Support returns Tuesday, Sept. 8. Until then, stay crafty!
20% off Sitewide*
20% off Sitewide*
20% off Sitewide*
20% off Sitewide*
20% off Sitewide*
20% off Sitewide*
20% off Sitewide*
20% off Sitewide*
20% off Sitewide*
20% off Sitewide*
Item added to your cart
Shop by
Posted by Spellbinders Team on May 04, 2018
Video Friday | Inked Terrarium Hello Card with Nichol
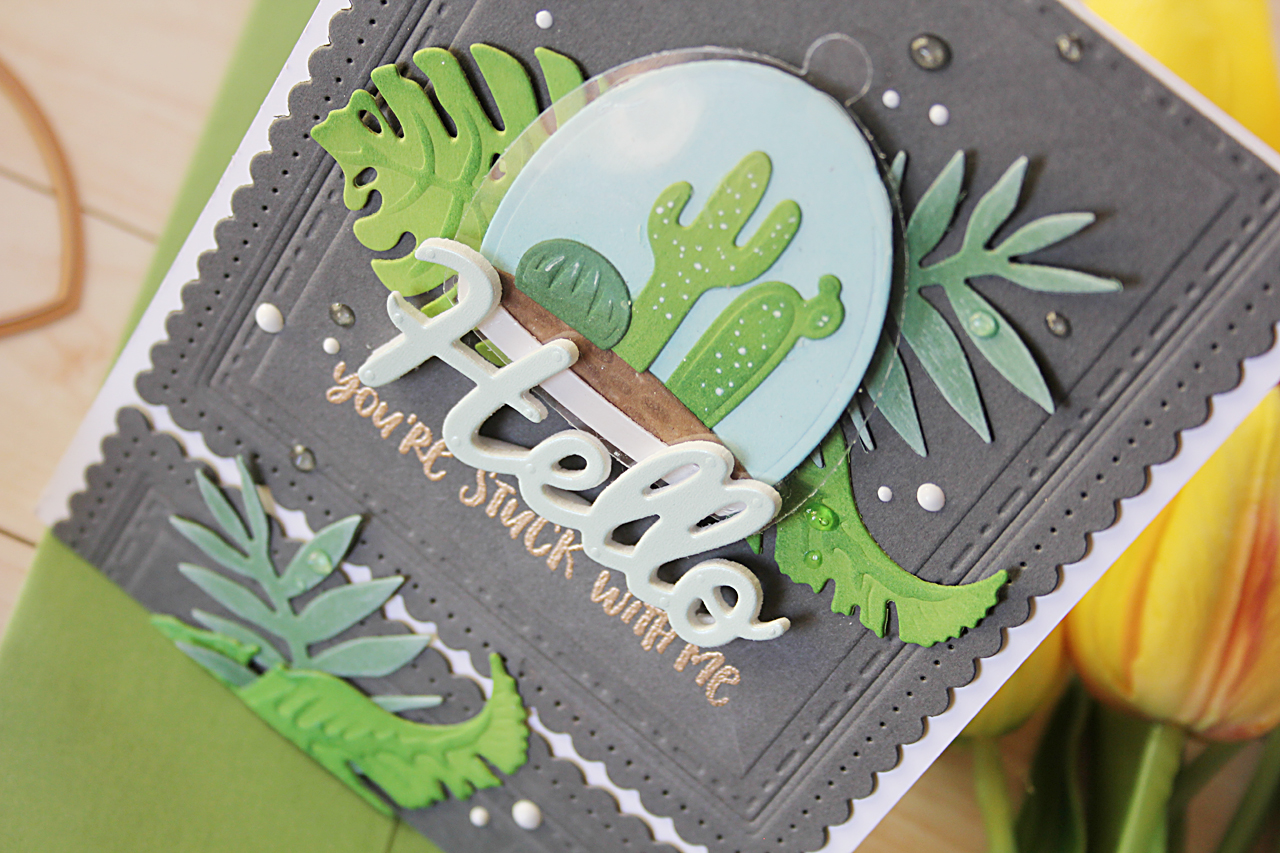
Hello everyone. This is Nichol Spohr and I’m thrilled to be here today with this die cut terrarium and greenery card. Adding detail to die cuts with ink is one of the easiest ways to immediately add depth and dimension to the images. Popping some of the images up with foam adhesive and layering additional greenery behind the terrarium give this card added interest.
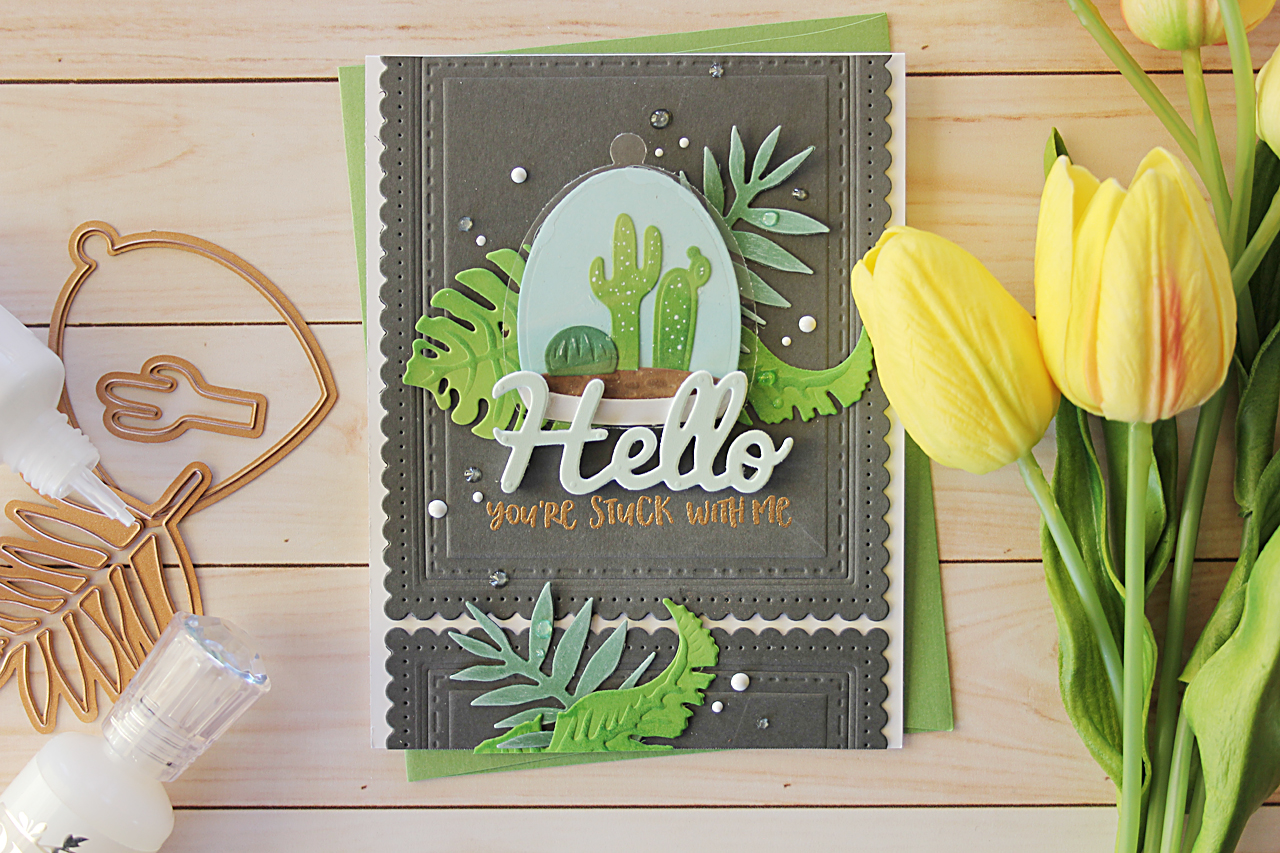
The background of the card was created by die cutting and embossing frames from dark gray cardstock using the Fancy Edges Rectangles. A sentiment was stamped and embossed on one of the panels and they were adhered to a white top fold card base as shown, trimming the excess to fit the card front.

Greenery from the Tropics die set were die cut from two shades of green cardstock and inked with white pigment ink or Mowed Lawn Distress Ink to add detail.
The images from the Build A Terrarium die set were die cut from two shades of green cardstock, aqua cardstick, brown cardstock, metallic white cardstock, and acetate. The aqua background was inked with white pigment ink, the cacti inked with Mowed Lawn Distress Ink, and the pebbles/sand inked with Gathered Twigs Distress Ink.
The greenery was adhered to the background as shown and the terrarium was assembled and adhered with foam adhesive squares over the greenery at the top of the design to help it stand out.
The Hello Greeting from the Phrase Two dies was die cut from a light green metallic cardstock adhered to fun foam with Stick It Adhesive and adhered above the stamped and embossed sentiment.
The design was finished with a scattering of Nuvo Crystal Drops in Simply White and Morning Dew.
VIDEO TUTORIAL
Watch video tutorial below or on Youtube to learn how to make this project:
Lawn Fawn Cilantro cardstock, Lawn Fawn Noble Fir cardstock, Lawn Fawn Mermaid cardstock, Lawn Fawn Paper Bag cardstock, Lawn Fawn Storm Cloud cardstock, DCWV Bright & Pastel Foil Cardstock, DCWV Metallics Cardstock, Judikins Embossable Plastic; Honey Bee Stamps Prickly Sentiments Stamp Set; Simon Says Stamp White Pigment Ink; Ranger Distress Ink in Gathered Twigs, Mowed Lawn; Versamark Ink; Simon Says Stamp Antique Gold Embossing Powder; Sakura white gel pens; Tonic Nuvo Crystal Drops in Simply White and Morning Dew; Fun Foam; Adhesive: Stick It Adhesvie Sheets
I hope this has inspired you to add detail to your die cuts with ink. Thank you so much for joining me today and I look forward to sharing more die cutting ideas with you soon!
Hi, crafty friends! Lisa Tilson here, and I'm delighted to be with you today sharing a fun interactive birthday card featuring the new Spellbinders Card Spinners. If you've ever wanted to add movement to your handmade cards without complicated mechanisms, these spinners make it incredibly easy! For today's project, I'm using the Large Card Spinner to create an adorable birthday monster that spins with just a...
Turn layered scalloped frames into a colorful Halloween gallery wall! This step-by-step tutorial shows how to emboss and arrange the Scalloped Frames, assemble the adorable Drac character from Simon Hurley's Halloween Hugs Collection, and create a playful handmade Halloween card full of dimension and color.
Celebrate treasured memories with a handmade vintage journal featuring interactive pages, pockets, vintage photos, and layered embellishments. This step-by-step tutorial showcases creative ideas for building meaningful double-page spreads with Esther Glas' Turn the Page collection.
1 comment
I simply adore this, Nichol!