


Posted by Yana Smakula
on October 14, 2019

Hello, Hero Arts fans! Welcome back for another episode of the Color Layering video series !

In this video and episode, we are taking a closer look at the Color Layering Peace stamp set .
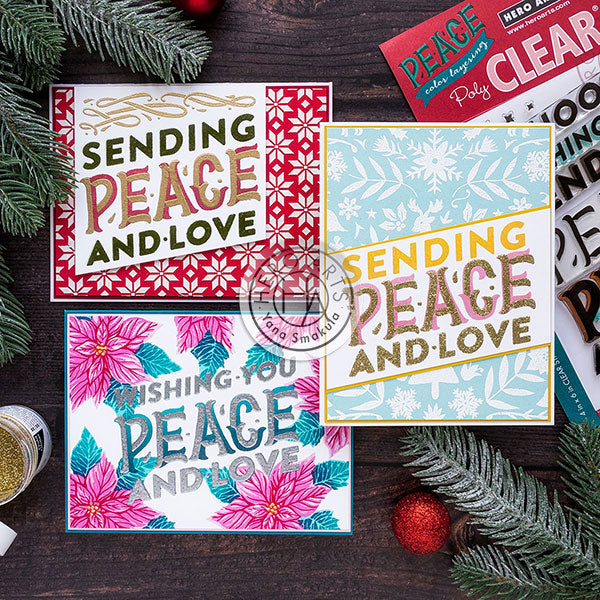
Watch the video tutorial below to learn how I made the cards I'm sharing today.
If you’re having a problem viewing this video, please try watching it HERE in HD on YouTube.
This stamp set features a large word "Peace" and a detail layer to create shadows and add interest. The set also has a swirl decorative element that can be used to complete the stamping as well as some pretty stars. Of course, you also have other words and phrases to build your own sentiment, you have several options.
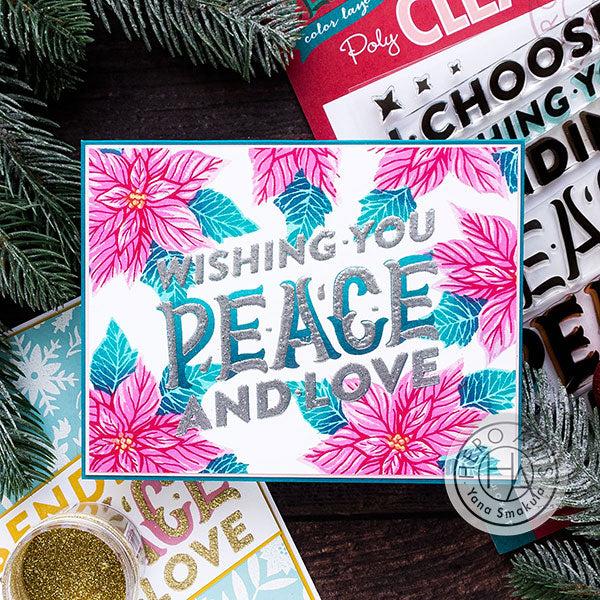
For my first card, I stamped "Wishing You Peace And Love." I stamped the sentiment in Pool to Navy Ombre ink and used Silver Glitter embossing powder for the top layer.
Next, I stamped poinsettias around the sentiment framing it. I used Soft Pink , Ultra Pink and Crimson inks for the flower and same Pool to Navy Ombre for the leaves.
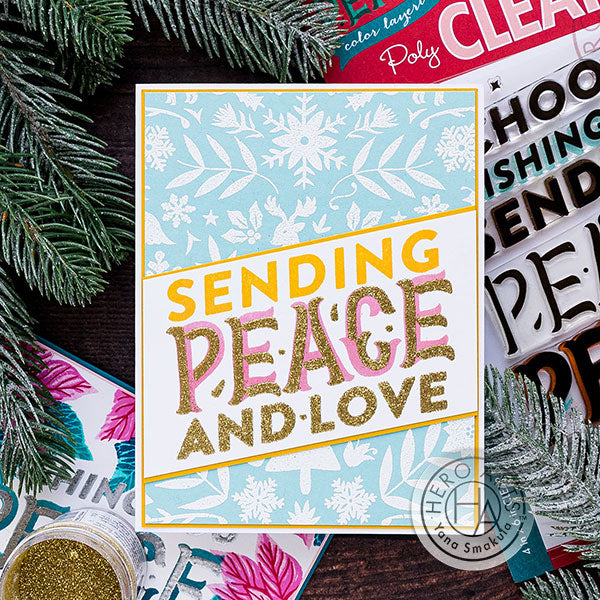
My second card features a similar design. I stamped the word "Peace" in Ultra Pink and added Gold Glitter embossing powder on top. The word "sending" was stamped in Butter Bar . For the background I used Hero’s new Nordic Holiday Bold Prints cling background stamp and heat embossed it in white on Arctic cardstock , backed it with Mustard and added to an A2 Dove White card base .
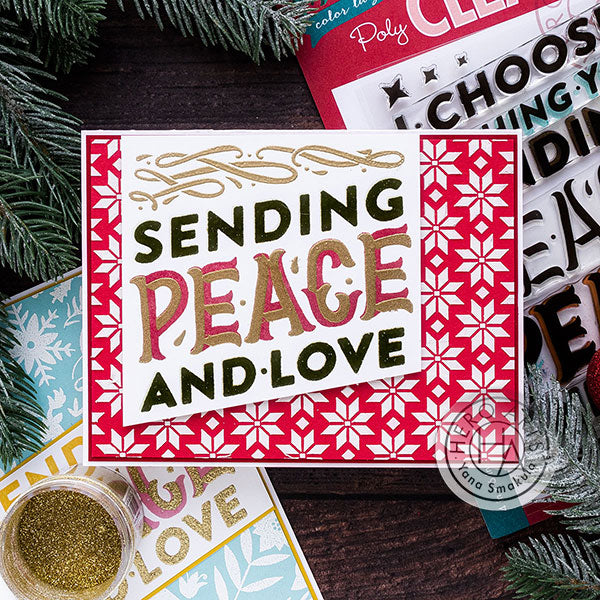
For the final card, I stamped "Peace" in Red Royal , added "Sending" & "Love" in Forever Green and finished it off with gold heat embossed accents.
To complete this card I used one of the new stencils - the Poinsettia along with white modeling paste and Cherry cardstock to create a simple background. I trimmed the sentiment panel at an angle and foam mounted onto the card.
Have fun stamping!























































































10 comments
Loved the new sentiment and how versatile it was. I think I like the traditional colors the best. I do like the design of the poinsettia card, though. Thanks for sharing your talents with us.
Gorgeous cards Yana, thank you so much for showing how to make these.
Have a wonderful day.
This video is amazing and the cards too.
I love to use my Hero Arts Poinsettia stamp set!!
The ombre ink is gorgeous!!!
Lovely cards with great layering and stencil work! :)
Amazing video!!!!!
I love to use my Hero Arts Poinsettia stamp set. ❤
The ombre ink is fabulous!!!!!!