A Wintry Thank You - Hero Arts
Posted by Seeka SkyPaperScissors on December 20, 2022

A Wintry Thank You

Hello and welcome! Seeka here and today I'm sharing a wintry card that will be great for all those post-holiday thank yous.

I started off by using a large blending brush to blend Amethyst ink around the border of a 4.25" x 5.5" panel of Passion Flower cardstock, slightly offsetting the color a bit because I also planned to offset the stenciled snowflake pattern.

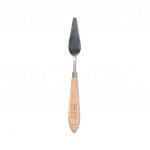
Next, I positioned the Snowflake Stencil over the panel, offset towards the right, and used painter's tape to temporarily hold it in place. Using a palette knife, I spread White Hero Paste over the stencil and onto the panel. I removed the stencil and then quickly washed it and the palette knife. Note that sometimes pastes will absorb ink so if you find that your paste turns a little bit purple and you prefer a brighter white, you can reposition the stencil and add another thin layer of paste.

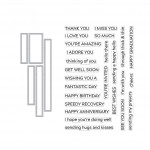
While the panel was drying, I created the sentiment by using the die in the Big Hugs Stamp & Cut set to cut Amethyst cardstock. I also cut the sentiment twice more from white cardstock. I layered and glued the three pieces together to create a sturdier sentiment and then I used foam tape to adhere it to the background. To finish, I stamped the small "thank you sentiment" (from the Message Strips Stamp & Cut XL set) in Onyx pigment ink before gluing the card front to a card base.

Thank you so much for visiting!

Click on products to shop:

SA202 Snowflake Stencil | Hero Arts

HA ]
DC283 Big Hugs Stamp & Cut - Hero Arts
HA ]
DC286 Message Strips Stamp & Cut XL
HA ]
AF720 Amethyst Core Ink | Hero Arts
HA ]
PS337 Hero Hues Premium Cardstock...
HA ]
PS318 Hero Hues Premium Cardstock...
HA ]
NK352 Hero Paste | Hero Arts
HA ]
HT215 Hero Tools Palette Knife
HA ]
MI006 Hero Tools Ink Blending Brush...
HA ]

Leave a comment

Your email will not be published. Please note, comments need to be approved before they are published.


  • How to Use Dies Beyond Basic Cutting

    Technique Tutoral

    Creative Die Cutting Techniques Every Cardmaker Should Try

    Ready to get even more from your metal dies? Discover a collection of creative die cutting techniques that go far beyond basic cutting. From embossing and eclipse designs to partial die cutting, shaped card bases, shaker cards, and interactive projects, this beginner-friendly guide will help you unlock the full potential of your Spellbinders dies.

  • September 2026 Small Die of the Month Preview & Tutorials – Owl Be There

    Spellbinders Blog

    September 2026 Small Die of the Month Preview & Tutorials – Owl Be There

    Our September 2026 Small Die of the Month preview & tutorials are here! This "Owl Be There" die set features 21 cutting dies. Enjoy the step-by-step tutorial below as well as the video tutorial to get you started with this month’s kit. Make sure to show us what you create by tagging #SpellbindersClubKits on social media! Spellbinders Monthly Clubs are exclusively designed by our in-house...

  • September 2026 Clear Stamp + Die of the Month Preview & Tutorials – Stuffed With Gratitude

    Spellbinders Blog

    September 2026 Clear Stamp + Die of the Month Preview & Tutorials – Stuffed With Gratitude

    Our September 2026 Clear Stamp & Die of the Month preview & tutorials are here! Join the Clear Stamp & Die of the Month Club and receive an expertly designed clear stamp and coordinating die set each month, complete with inspiration. Plus, members get store savings, extra deals, gifts, and more. This stamp set features made-in-the-USA stamps from high-quality photopolymer for clear, crisp impressions. Our...