
Happy Labor Day, crafty friends! Our offices are closed on Monday, Sept. 7. Support returns Tuesday, Sept. 8. Until then, stay crafty!
20% off Sitewide*
20% off Sitewide*
20% off Sitewide*
20% off Sitewide*
20% off Sitewide*
20% off Sitewide*
20% off Sitewide*
20% off Sitewide*
20% off Sitewide*
20% off Sitewide*
Item added to your cart
Shop by
Posted by Spellbinders Team on September 14, 2018
Video: Creating a Spot Light for Holiday Card with Kelly Latevola
Hello Crafters! Normally, I'm all about the Copic coloring but today's technique actually focuses on the background. With the holidays just around the corner I think you're going to find this one pretty fun and useful!
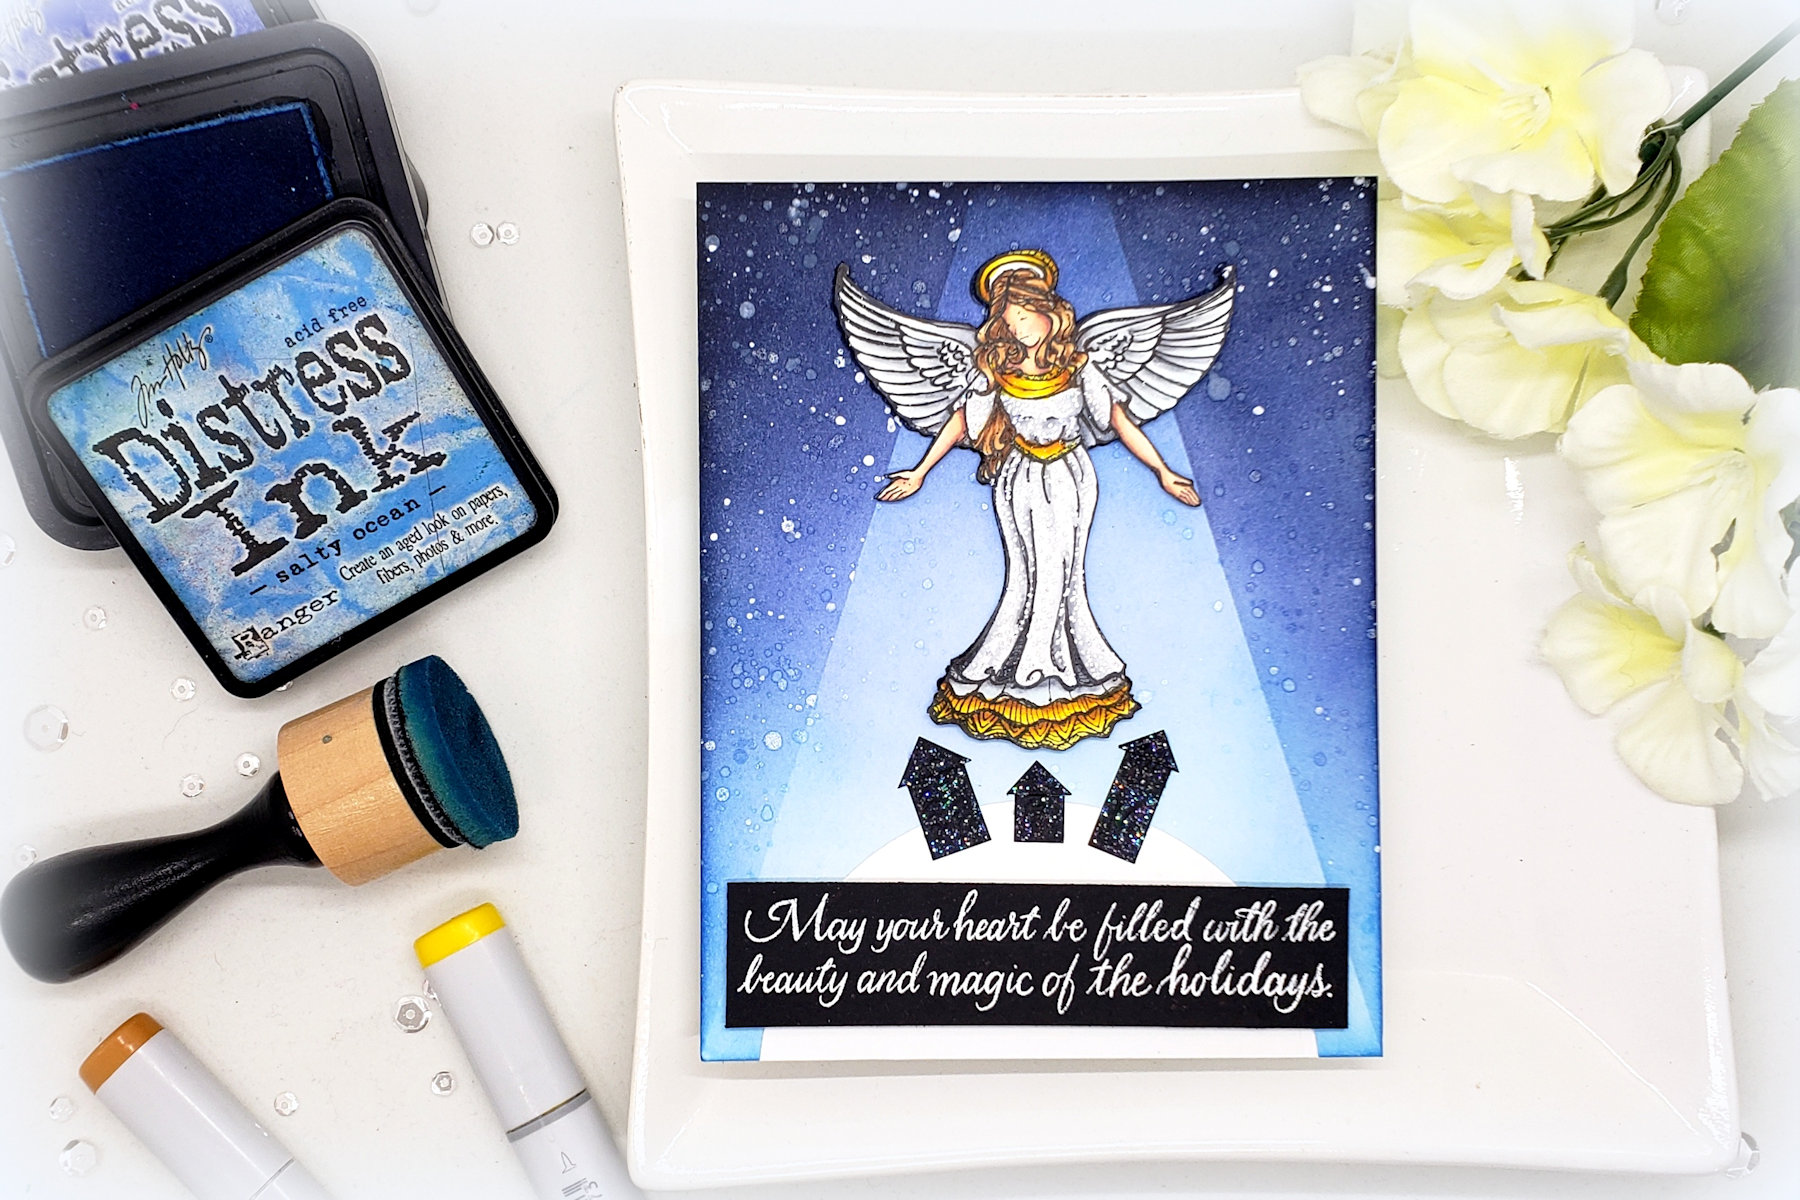
When I first saw the Joyful Season Angel from the Zenspired Holidays collection I though she looked like she was descending. That's what gave me the idea to give her a bit of light to carry her. I started ink blending one layer of various blues. Since I wanted a night sky look I used medium to darker blues and a black. Once I had the first layer down I added a few splatters of shimmer spray. I then stamped my angel down for placement.

I used masking tape to create a triangle shape around my angel getting wider toward the bottom. I already knew I wanted her to be cascading her light onto a little miniature town. With the masks in place I added even darker distress ink on top pf my background. I used more shimmer spray and white acrylic paint to create stars. The acrylic paint will create brighter stars. In real life stars are not as bright in lighter areas and I wanted to mimic that.
I stamped the angel a second time on white dardstock and colored her with Copic markers. I used a metallic silver marker and a white gel pen to create a shimmer or glittery dress for her. Because honestly don't all angels glitter just a little bit? I used the smallest dies from the rectangles and squares to create some house which I placed on top of a snow covered "world" I cut withe the largest circle die.
VIDEO TUTORIAL
Watch video tutorial below or on Youtube to learn how to make this project:
The whole card feels so Christmas-y without any red or green at all. I love how it came out!
Neenah 80lb Solar White Card Stock, Black Card Stock from Simon Says Stamp, Distress Ink: Salty Ocean, Blueprint Sketch, Chipped Sapphire, Black Soot, Ink Blending Tool, Ranger Craft Mat, Hero Arts White Iridescent Shimmer Spray, White Acrylic Paint, Stiff paint brush, Tombow Mono Multi Glue, Wink of Stella Clear Glitter Pen, Stardust Stickles, Silver Sakura Gel Pen, White Sakura Gel Pen, Scotch Foam Tape, Heat Gun, Simon Says Stamp White Embossing Powder, Inkadinkado Embossing Bag, Versamark Ink, Ranger Craft Pick, Copic Markers: C1, C3, C5, E53, E55, E57, E59, Y02, Y08, YR24, E99, B0000, E50, E00, E11, E04, R20,
Thank you so much for stopping by! I hope you'll try spotlighting in your backgrounds now that you know how easy it is!
Share this article
4 comments
Love how you created this spotlight! It just makes this card so perfect, highlighting both the lovely angel image and the heartfelt sentiment. tfs
This video was awesome….what a cool way to put on a spotlight onto the image you want to stand out….and of course this beautiful angel should be this cards stand out….Love it….thank you so much for sharing…
Hi, crafty friends! Lisa Tilson here, and I'm delighted to be with you today sharing a fun interactive birthday card featuring the new Spellbinders Card Spinners. If you've ever wanted to add movement to your handmade cards without complicated mechanisms, these spinners make it incredibly easy! For today's project, I'm using the Large Card Spinner to create an adorable birthday monster that spins with just a...
Turn layered scalloped frames into a colorful Halloween gallery wall! This step-by-step tutorial shows how to emboss and arrange the Scalloped Frames, assemble the adorable Drac character from Simon Hurley's Halloween Hugs Collection, and create a playful handmade Halloween card full of dimension and color.
Celebrate treasured memories with a handmade vintage journal featuring interactive pages, pockets, vintage photos, and layered embellishments. This step-by-step tutorial showcases creative ideas for building meaningful double-page spreads with Esther Glas' Turn the Page collection.
4 comments
Love how you created this spotlight! It just makes this card so perfect, highlighting both the lovely angel image and the heartfelt sentiment. tfs
This video was awesome….what a cool way to put on a spotlight onto the image you want to stand out….and of course this beautiful angel should be this cards stand out….Love it….thank you so much for sharing…
I love this card. It is just beautiful.
Absolutely heavenly!






























