


Posted by Spellbinders Team
on April 28, 2024

Hi there, this is Annie Williams and I’m excited to be back on the blog today to share a couple of cute cards made with the new Spring Has Sprung Collection by House Mouse. The sweet images and fun sentiments in this collection are perfect for so many occasions and I was inspired to create three colorful cards with them.
 Stamp the image from the Flower Shower Stamp Set in black alcohol-friendly ink onto white cardstock and color it in with Copic markers. Once colored, die-cut it out using one of the Notched Corner Frames Dies. Lightly blend Lost Shadow and Salty Ocean Distress Ink around the edges of the die-cut to give the illusion of a ground and sky.
 Trim a piece of Rainforest Cardstock to 4.25” x 5.5”, emboss it with the Flowers & Foliage 3D Embossing Folder, and adhere it to a top-folding A2-sized white card base with a tape runner. Pop the colored panel up in the center of the card front with foam adhesive. Stamp a sentiment from the stamp set onto white cardstock, trim it out into a small strip, and adhere it in the top corner with more foam adhesive.
 Stamp the image from the Breezy Day Stamp Set in black alcohol-friendly ink onto white cardstock. Color the entire background with a blue Copic marker, then dab over the background with a textured cloth soaked in Copic colorless blender to add a little interest. Once dry, color the rest of the image in with Copic markers.
 Trim a piece of Pink Sand Cardstock to 4.25” x 5.5” and cut the center of it out using one of the Essential Stylish Ovals Dies before embossing it with the Woven 3D Embossing Folder. Adhere the colored image behind the embossed panel with foam adhesive and add to a top-folding A2-sized white card base. Stamp a sentiment from the stamp set onto white cardstock, cut it into a small strip, and add it to the lower corner with more foam adhesive.
 Stamp the image from the Birthday Wishes Stamp Set onto white cardstock using black alcohol-friendly ink and color it in with Copic markers. Die cut the image out using one of the Postage Edge Rectangle Dies and leave the panel inside of the die. Blend Salty Ocean Distress Ink around the top edges and Lost Shadow Distress Ink around the bottom edges, removing the die when done to reveal a perfectly masked postage edge.
 Stamp a sentiment from the stamp set in black ink onto the upper left corner of the colored panel (use a stamp positioner to ensure perfect placement!). Trim a piece of Lilac Blossom Cardstock to 4.25” x 5.5”, emboss it with the Plaid Company Embossing Folder, and adhere it to a top-folding A2-sized white card base with tape runner. Pop the colored panel up on top of the card front with foam adhesive.

Sweet Spring Card
In my neck of the woods, warmer spring weather has finally arrived and I wanted to celebrate using the adorable image from the Flower Shower Stamp Set. Here I paired it with a bright embossed background for this cheerful spring card. Stamp the image from the Flower Shower Stamp Set in black alcohol-friendly ink onto white cardstock and color it in with Copic markers. Once colored, die-cut it out using one of the Notched Corner Frames Dies. Lightly blend Lost Shadow and Salty Ocean Distress Ink around the edges of the die-cut to give the illusion of a ground and sky.
 Trim a piece of Rainforest Cardstock to 4.25” x 5.5”, emboss it with the Flowers & Foliage 3D Embossing Folder, and adhere it to a top-folding A2-sized white card base with a tape runner. Pop the colored panel up in the center of the card front with foam adhesive. Stamp a sentiment from the stamp set onto white cardstock, trim it out into a small strip, and adhere it in the top corner with more foam adhesive.
Springtime Hello Window Card
The Breezy Day Stamp Set is another cute one perfect for sending a springtime hello. I was imagining these little critters playing around in a laundry basket, so added them behind a woven-embossed window.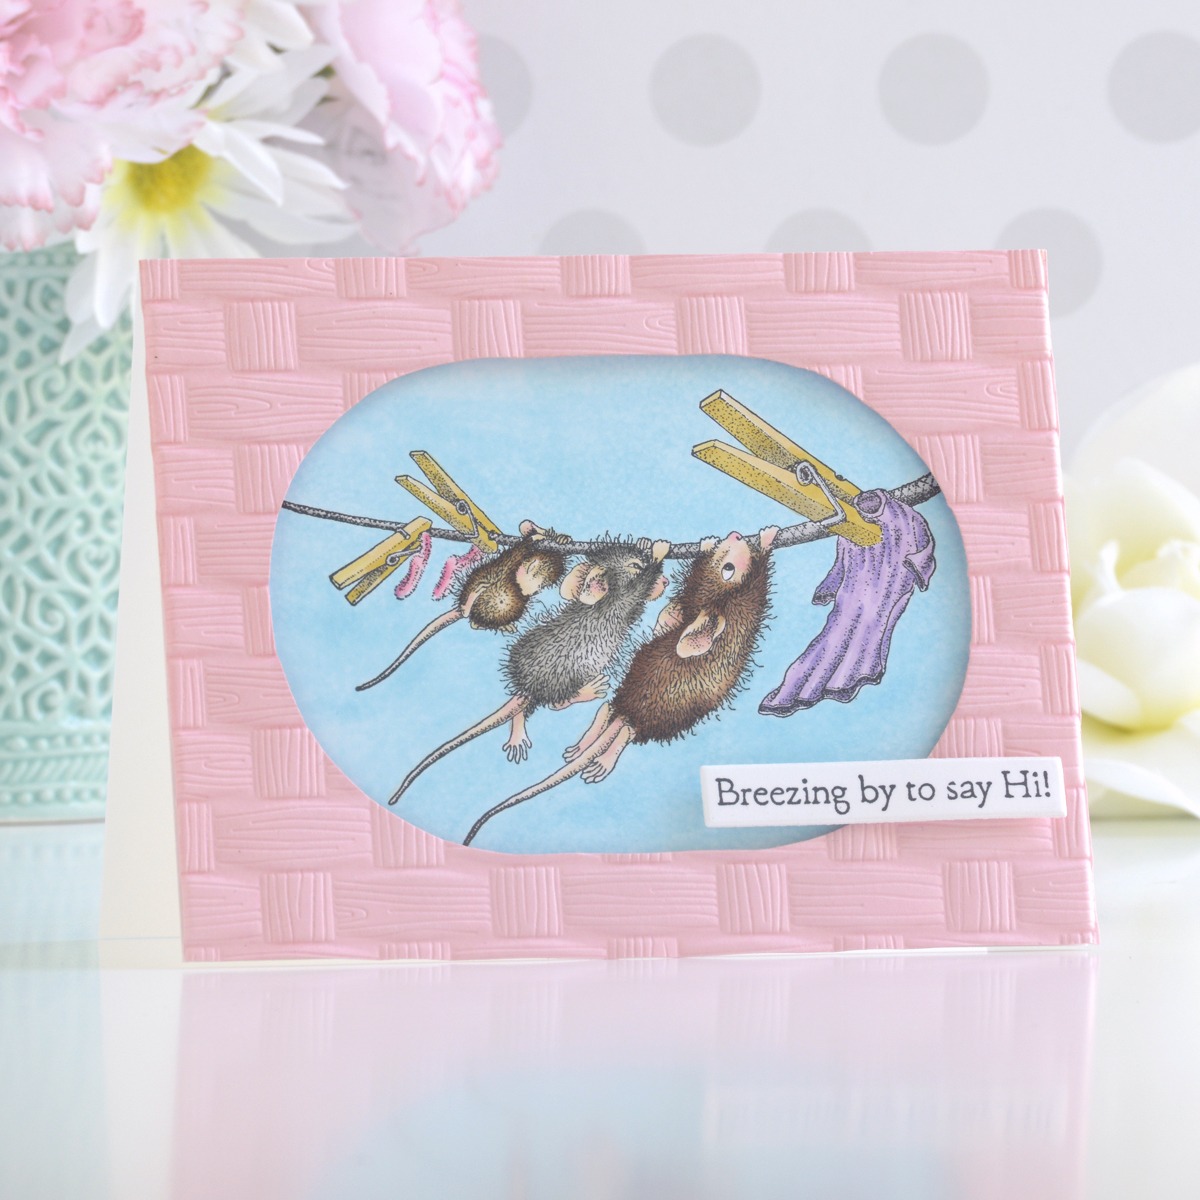 Stamp the image from the Breezy Day Stamp Set in black alcohol-friendly ink onto white cardstock. Color the entire background with a blue Copic marker, then dab over the background with a textured cloth soaked in Copic colorless blender to add a little interest. Once dry, color the rest of the image in with Copic markers.
 Trim a piece of Pink Sand Cardstock to 4.25” x 5.5” and cut the center of it out using one of the Essential Stylish Ovals Dies before embossing it with the Woven 3D Embossing Folder. Adhere the colored image behind the embossed panel with foam adhesive and add to a top-folding A2-sized white card base. Stamp a sentiment from the stamp set onto white cardstock, cut it into a small strip, and add it to the lower corner with more foam adhesive.
Colorful Birthday Cake Card
Lastly, the Birthday Wishes Stamp Set might be one of my new favorite birthday images. Here I colored it up in bright colors and framed it out with a postage edge for a sweet way to send birthday wishes to a friend. Stamp the image from the Birthday Wishes Stamp Set onto white cardstock using black alcohol-friendly ink and color it in with Copic markers. Die cut the image out using one of the Postage Edge Rectangle Dies and leave the panel inside of the die. Blend Salty Ocean Distress Ink around the top edges and Lost Shadow Distress Ink around the bottom edges, removing the die when done to reveal a perfectly masked postage edge.
 Stamp a sentiment from the stamp set in black ink onto the upper left corner of the colored panel (use a stamp positioner to ensure perfect placement!). Trim a piece of Lilac Blossom Cardstock to 4.25” x 5.5”, emboss it with the Plaid Company Embossing Folder, and adhere it to a top-folding A2-sized white card base with tape runner. Pop the colored panel up on top of the card front with foam adhesive.
Spellbinders Supplies:
























































































1 comment
A visual delight that was executed so well! Selected colors are so pretty together. Just made me smile…