


Posted by Spellbinders Team
on May 05, 2024

Hello crafty friends! It’s Jung here, and I am back with another guest post on the Spellbinders blog. For my projects today, I’m working with the Yasutomo Aquarelle watercolor pallet and Yasutomo Fusion brushes. I made a beautiful card, featuring the Let’s Celebrate BetterPress collection by Yana Smakula.
 After I gathered my supplies, I started out by adding a light wash of color to an A2 porcelain BetterPress cotton panel. I added 3 different pinks from the watercolor pallet to the Yasutomo porcelain flower dish and watered the colors down significantly. Then, I added a thin layer of water all over the cotton panel. I used the largest Yasutomo brush (size 5) to paint the panel, adding the 3 different pinks to random spots on the panel. Since the panel was wet already, the colors spread and blended beautifully.
 I dried the panel with my heat tool. Once fully dry, I taped the watercolored panel to the Platen of my BetterPress system. I used the Black ink, the Floral Celebration Press Plate, and the BetterPress system. I ran it through my Platinum 6 to create the floral background.
 Next, I loaded up the flower dish with more pink and red tones. This time, I made sure to add lots of color to make it more pigmented. Using The size 2 brush, I colored in the flowers.
 Once the flowers were painted, I cleaned out the flower dish, washed my brush, and changed out the water cup. I loaded up the flower dish with different tones of green, again adding a lot of color. I used the size 2 brush to color in the leaves with the different greens.
 Next, I worked on the sentiments. I used the Let’s Celebrate Sentiments BetterPress plate. For the sub sentiment, I used the BetterPress system, black ink, and a porcelain cotton panel. For the larger sentiment, I ran it through my Glimmer Hot foil system using Magenta foil and smooth white cardstock. I used the coordinating die for the large sentiment, and a sentiment die from my stash for the sub sentiment.
 To finish off my card, I trimmed down the watercolor panel to about 4 x 5 ¼ in. I adhered it to an A2 white card base with foam tape.
 Next, I glued on the sub sentiment and then adhered the larger sentiment with foam tape.

 I had so much fun watercoloring the background! These watercolors are very pigmented. They are not “transparent” like other watercolors I’ve worked with.

 After I gathered my supplies, I started out by adding a light wash of color to an A2 porcelain BetterPress cotton panel. I added 3 different pinks from the watercolor pallet to the Yasutomo porcelain flower dish and watered the colors down significantly. Then, I added a thin layer of water all over the cotton panel. I used the largest Yasutomo brush (size 5) to paint the panel, adding the 3 different pinks to random spots on the panel. Since the panel was wet already, the colors spread and blended beautifully.
 I dried the panel with my heat tool. Once fully dry, I taped the watercolored panel to the Platen of my BetterPress system. I used the Black ink, the Floral Celebration Press Plate, and the BetterPress system. I ran it through my Platinum 6 to create the floral background.
 Next, I loaded up the flower dish with more pink and red tones. This time, I made sure to add lots of color to make it more pigmented. Using The size 2 brush, I colored in the flowers.
 Once the flowers were painted, I cleaned out the flower dish, washed my brush, and changed out the water cup. I loaded up the flower dish with different tones of green, again adding a lot of color. I used the size 2 brush to color in the leaves with the different greens.
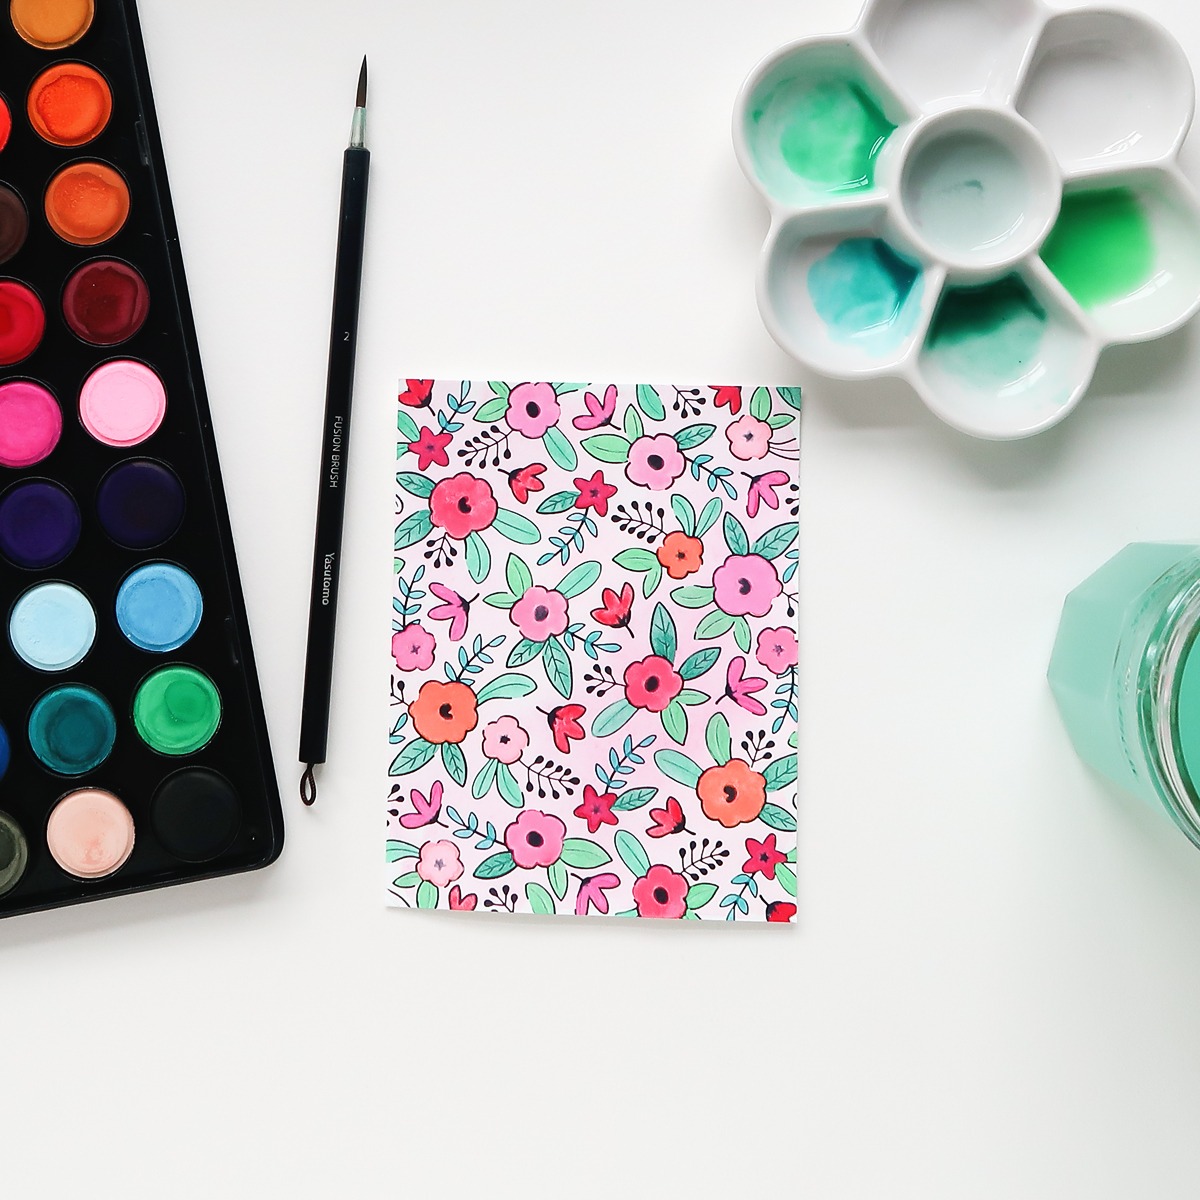 Next, I worked on the sentiments. I used the Let’s Celebrate Sentiments BetterPress plate. For the sub sentiment, I used the BetterPress system, black ink, and a porcelain cotton panel. For the larger sentiment, I ran it through my Glimmer Hot foil system using Magenta foil and smooth white cardstock. I used the coordinating die for the large sentiment, and a sentiment die from my stash for the sub sentiment.
 To finish off my card, I trimmed down the watercolor panel to about 4 x 5 ¼ in. I adhered it to an A2 white card base with foam tape.
 Next, I glued on the sub sentiment and then adhered the larger sentiment with foam tape.

 I had so much fun watercoloring the background! These watercolors are very pigmented. They are not “transparent” like other watercolors I’ve worked with.
Just a little tip: be careful when painting over the black lines. I used a black pen over some of the areas, because I painted over the lines, and they were covered by the paint (the veins in the leaves, for example).I love the Let’s Celebrate BetterPress collection by Yana Samula; the sentiments are so versatile! I hope you got some inspiration today. Make sure you check out the Spellbinders website for all of these supplies!
Spellbinders Supplies:
























































































