


Posted by Channin Pelletier
on April 05, 2022


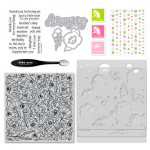
Hello friends! It’s Channin here and today we are going to get inky with a faux watercoloring technique featuring the new April My Monthly Hero Kit ! Watch the video below to see how I create a splashy watercolored background with the included stencils from this month’s kit and then add depth to the images with shadows and highlights.
Watch below or HERE on the Hero Arts YouTube channel.
To create this card I first stamped a large panel (6 1/2” x 8 1/2”) of bristol paper (smooth or vellum) with the included cling stamp in Embossing & Watermark Ink . I then poured Detail Black Embossing Powder over the background and heat set with a heat tool.

Next, with the stencils, I colored the flowers and leaves in with several Reactive Inks. I used Taffy , Berry Smoothie , and Purple Galaxy for the flowers and Key Lime Fizz and Blue Raspberry for the leaves. Once I had finished ink blending the images I then spritzed the panel with water to activate the ink and then used a rocket air blaster to move the ink around and to slightly mix the colors.

After the panel had dried I colored the bees and added shadows around the images with markers. When I finished with the markers I then added highlights with a white gel pen. After the highlights I trimmed the background down to 6” x 6” and cut the panel in half diagonally. Next I adhered the halves onto two Dove White top-folding card bases and set the cards aside.

I then die cut four “amazing's” out of Pitch Black cardstock and die cut one mat layer out of vellum with the included word dies. I adhered three of the black “amazing’s” together and then adhered the last “amazing” to the vellum mat. I finished the stacked sentiment by adhering the two pieces together. Next, I repeated this process to create a second stacked “amazing”.
I then stamped and white heat embossed two sub-sentiments onto Pitch Black cardstock and fussy cut them out. Lastly, I finished the cards by adhering the sub-sentiments and stacked “amazing’s” to the card fronts.
I hope you enjoyed today’s cards and video! Thank you so much for stopping by!

|
























































































3 comments
oh I LOVE the bright colors, gorgeous cards ♥
Love, love, your card! Thank you for the video! I love your style!
I love the layering stencils in this kit – it really looks like a lot fun.