


Posted by Dana Joy
on February 08, 2021


Good morning everyone. It's Dana here with you today. Who's ready for a vacation? Since traveling right now is out of the question, I'm going to dream of a vacay through my card. The tutorial I'm sharing with you today features the new Vintage Paradise stamp set. This stamp set just feels like a vacation. We will be doing some ink blending using Hero Hues Reactive Inks to make a pretty background.
(If you are having trouble viewing this video, please watch HERE on YouTube.)
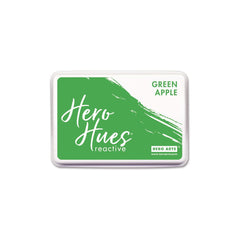
The card started first with a 4.50 x 5.75 inch piece of Dove White Cardstock . I created my "land" and "sky" by ink blending Lemon Drop , Fruit Punch, Berry Smoothie , Key Lime Fizz and Green Apple Reactive inks across my card panel.

Next I stamped foliage along the bottom of my card leaving a space to add in a palm tree. Stamping my palm tree in Green Apple and Cup O' Joe inks to make it look more realistic. I used Copic makers to add definition to the tree as well.

I trimmed down the panel and smoothed out my blending of ink along the bottom of the image. Lastly I stamped two of the sentiments from the set in the Cup O' Joe ink and outlined the top sentiment with a white gelli roll pen. Now this panel was ready for a card base. I used the Hero Arts Dove White Side Folded Card.
Thanks for stopping by today. Let us know what color combinations you would use with this stamp set. Make sure to share on social media and tag #heroarts.

|



























































































6 comments
This is one of the 2 sets I ordered from this release. It just got to my PO box today according to USPS tracking! I love your color combo, a bit different from “usual” ocean scene but with this “Vintage” stamps, your card looks lovely! <3 Can’t wait to get inky with my new purchase! (and I live in Hawaii! :)) Aloha~
Beautiful card Dana, I love your gorgeous blended background.
Thank you so much for sharing, stay safe and have a wonderful day.
I love this beautiful card! Thank you so much for sharing your video and tips for making a fabulous tropical vacation scene. Love it!!
Beautiful card. I love the subtle yet attention grabbing color combination. (:
Very colorful card with wonderful ink blending. It does make you want to be there. Thanks for all the tips and techniques.