

Posted by Channin Pelletier
on August 02, 2022


Hello friends! It’s Channin here and today I’m using the incredible new August 2022 My Monthly Hero Kit to create a slimline card with an expanding scene. Watch the video to learn how to construct an accordion slimline card base, ink blend a vibrant desert landscape with the kit inks and even learn a cool trick for stretching your stencils.
Watch below or on the Hero Arts YouTube channel.
To create this card I first trimmed down a sheet of Dove White cardstock to 8 1/2” x 10 1/2”. I then scored and folded the panel on the long side at 3 1/2” on both sides of the cardstock to create the accordion slimline card base. Next I trimmed the front card panel down to 2 1/2” and the middle panel to 4”. I then took that scrap that I trimmed off cut it along the score line to create two panels. Next, I trimmed off 1/16” off my longer panel so it will later fit on the middle panel of the card base.

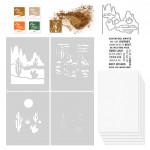
Next, I die cut the two panels with the landscape die included in the kit. I then flipped the larger panel over and ink blended on the backside with the layering stencils which I also flipped over to create a mirrored desert scene. I used Tangerine and Caramel for the buttes, Sand and Caramel for the ground, and Pine for the cacti/plants, which were all included in the kit. When I finished ink blending the mirrored desert scene, I ink blended the smaller panel in the same manner BUT with the stencil flipped to their correct side.

When I finished ink blending the panels I then ink blended a sky on the front of the back panel of the card base in Lemon Drop , Fruit Punch , Taffy , Blue Hawaii and Purple Galaxy Reactive Inks. Next, I adhered the desert panels to the card base and then die cut a moon out of Canary cardstock using the Nesting Circle Infinity Dies to create a moon. I then ink blended the moon with a little Lemon Drop and Tangerine to add some shading and then adhered it to the sky.

Next, I finished the card by stamping a sentiment from the kit’s included stamp set in INTENS-ified Black ink.
I hope you enjoyed today’s card and video! Thank you so much for stopping by!

Click on products to shop:
|


8 comments
Awesome slimline desert scene!
Your video is fabulous and the card is gorgeous. You have wonderful ink blending skills. I really had a a good time watching your video and feel inspired to create a beautiful card when I get my kit.
Gail
Gorgeous card!
I love your ink blending, thanks for the inspiration!
Lovely card with interesting techniques used. Thanks for sharing your great ideas with us.
This is such a creative idea, Channin. Love everything about this — the colors, the ink blending, the sentiment, the accordion fold design…very inspiring!