Mandalas and Pearls - Hero Arts
on July 22, 2022

Mandalas and Pearls

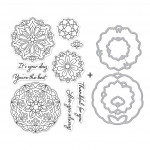
Hello and welcome! Seeka here and today I'm sharing a card featuring the Floral Mandala stamp set and coordinating dies, embellished with Gold Hero Pearls. The stamps and dies are also available as a bundle.

I started off by stamping all four mandala images in a light color ink onto a panel of Passion Flower cardstock. Because I later heat embossed the images, it was important to use a stamp positioning tool so I could precisely restamp the images with embossing ink. Using the lightly stamped image as my coloring guide, I selectively colored in areas of each mandala with a medium purple marker. When I finished, I replaced the panel in my stamp positioning tool and restamped using Embossing & Watermark Ink. I sprinkled Gold Embossing Powder over the panel, tapped off the excess, and then used a heat gun to melt the embossing powder.

Then, I die cut the mandalas and used Gold Hero Pearls to fill in the centers of each mandala and to add shiny gold details, using the small circles in the mandala patterns as a guide.

Next, I cut a 4" x 5.25" panel of Passion Flower cardstock and heat embossed a sentiment from the stamp set in the same gold embossing powder. Then I used foam tape to adhere the mandalas to the panel. I trimmed the mandalas where they hung off the panel and adhered one of the trimmed-off pieces at the top of the panel to give the appearance of five mandalas even though I only stamped four.

To finish, I used more foam tape to adhere the card front to an A2 card base made from Amethyst cardstock.

Thank you so much for visiting today!

Click on products to shop:
SB313 Floral Mandala Bundle
HA ]
CM614 Floral Mandala
HA ]
DF049 Floral Mandala Frame Cuts (C)
HA ]
NK440 Gold Hero Pearls 0.6 oz
HA ]
PW100 Gold Embossing Powder - Hero Arts
HA ]
AF419 Clear Embossing & Watermark Ink
HA ]
PS318 Hero Hues Premium Cardstock...
HA ]
PS337 Hero Hues Premium Cardstock...
HA ]

Leave a comment

Your email will not be published. Please note, comments need to be approved before they are published.


  • How to Create an In-Lay Die Cut Background with Candy Corn Dies, SDS-244, S5- 778, BD-1049

    BD-1049

    How to Create an In-Lay Die Cut Background with Candy Corn Dies

    Want to add more interest to your die-cut backgrounds? This tutorial demonstrates how to create a colorful in-lay die-cut background using the candy corn elements from the Snackula Die Set. You'll learn how to build an eye-catching Halloween background, add splatter effects for extra texture, and finish the design with a playful monster focal point. Inlay die-cutting is a great technique for creating clean, dimensional...

  • Holiday Chaos Card Tutorial with Spellbinders Deck the Dumpster: At Least it’s Lit! SDS-246, SDS-220, S4-1408

    Categories:Die Cutting

    Holiday Chaos Card Tutorial with Spellbinders Deck the Dumpster: At Least it’s Lit!

    How to Make a Funny Christmas Card with Die-Cut Raccoons Holiday cardmaking does not always have to be elegant and traditional. If December leaves you feeling more frazzled than festive, a funny Christmas card can capture that holiday chaos in a playful and memorable way. This dimensional card combines a die-cut dumpster fire with mischievous raccoons, colorful Christmas lights, snowy layers, and a perfectly relatable...

  • How to Make a Fun Chompster Birthday Card with Cake and Accessories, BD-1049, S5-778, S5-779, STP-295

    BD-1049

    How to Make a Snack-Themed Birthday Card with Chompster

    Funny birthday cards are even more memorable when they combine a playful character with a relatable sentiment. This snack-themed birthday card features Chompster dressed in a party hat and holding a large slice of birthday cake. The colorful die-cut layers, dimensional cake, and sparkling gems create a cheerful design that is perfect for birthdays and other celebrations. In this step-by-step tutorial, you’ll learn how to...