

Posted by Seeka SkyPaperScissors
on February 04, 2021

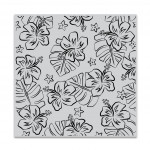
Hello, crafty friends! It's Seeka here and today I have an easy watercolor card to share. I love the gorgeous Hibiscus Flowers Bold Prints background stamp; paired with embossing, this pattern of large florals is quick and easy to color with Liquid Watercolors!

I started off by using Clear Embossing & Watermark Ink and Brass Embossing Powder to heat emboss the background image onto a 6" square piece of watercolor paper.
Next, I added a few drops of four Liquid Watercolor colors onto my glass work surface. I dipped a waterbrush pen filled with clean clear water into the ink and then painted each element of the background separately. I started with Dark Teal to paint the leaves and then I painted the large hibiscus blooms in Pink. Once the blooms were dry, I added a second layer of pink to the centers of the flowers, to deepen the color. Next, I painted the anthers and the small star-shaped flowers with Orange, and finally, I painted a very diluted Deep Ocean into the background.
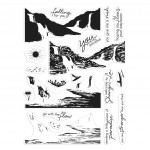
While the watercolor was drying, I used the same Brass Embossing Powder to heat emboss a sentiment from the Waterfall HeroScape stamp set onto a strip of Adriatic cardstock.

I trimmed the watercolor panel down to 4.25" x 5.5" and then cut one end of the sentiment strip at an angle before backing the strip with foam tape and adhering it to the background. To finish, I used Precision Glue to adhere the card front to a Dove White Top Folded Card.
Thank you so much for spending time with me today!

Click on products to shop:
|
























































































1 comment
Just gorgous Seeka, I love your beautiful watercolouring.
Thank you so much for sharing, stay safe and have a wonderful weekend.