

Posted by Hero Arts
on May 15, 2020


Hi everyone! It's time for our next Stay Crafty with Hero challenge! This week's theme is Small Joys. Over the past couple months, we've really been aware of how important it is to savor the small things in life. This sparked an idea for a challenge! Let's savor the "small joys" in our stamp sets! We're challenging you to make card or project using smaller stamps or dies. Whatever inspires you - but try to create something using the small joys in your craft stash!
Keep scrolling to the end of this post to find out how to share your project to be in the running for our prize, but first, here's some amazing examples from Jayne:
I decided to use today’s new Stay Crafty with Hero Challenge, Small Joys, as inspiration to create a few cards for some special, graduating seniors. Since graduations, like birthdays, are celebrations, I started by looking for small stamps in some of my favorite birthday sets.
For my first card, I stamped a few balloons from the Birthday Paw-ty set and some confetti from the Festive Balloon set across the top edge of a trimmed panel of Dove White cardstock with Intens-ified Black ink. After letting the ink dry for a minute or two, I used colored pencils to color the images. I also added tiny, colored hearts from the Surprise Gift set onto each balloon.
Then, I stamped four leaping figures from the Color Layering Pier at the Lake set, die cut them with the coordinating dies, and secured them to the panel with foam tape. I embossed and stamped sentiments from the Congrats Happy Stamp & Cut set onto two cardstock strips. Last, I secured the panel to a Kiwi card base and added a trio of enamel dots.
For a second, similar card, I stamped small balloons and a tiny sentiment from the Wish Big Peek-A-Boo Parts set along the left side of a piece of white cardstock. Like my first card, I stamped confetti around the balloons and secured several stamped and die cut figures onto the panel.
I colored the images with bright colored pencils, secured the panel to an Adriatic card base, and added a pair of sentiment strips. The cute typewriter font sentiment is from the From the Vault Birthday set.
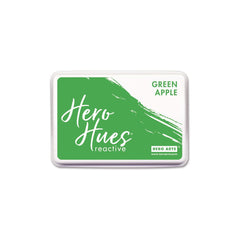
While my supplies were out, I made one more card. This time, I cut some circle masks with the Nesting Circle Infinity Dies and inked a row of circles across a white cardstock panel. I used Taffy, Creamsicle, Lemon Drop and Green Apple reactive inks for easy blending.
Once again, I stamped balloons and confetti across the card but this time, I used the Birthday Paw-ty Frame Cuts to die cut around a few of the balloons for extra dimension. I also embossed a larger sentiment panel on Pitch Black cardstock that I matted with vellum.
Now it's your turn - we'd absolutely love for you to join us! We want to encourage you to actually sit down and enjoy the process of creating. We know it is a source of fun, relaxation and stress relief - something we all can use a bit more of right now. Create a new card for this challenge with the theme of SMALL JOYS. Use the Inlinkz tool at the very bottom of this post to link up your card, and you will be entered into our drawing. We will be giving a $35 gift certificate randomly to one person who plays along! To link up your project, you need to share it publicly somewhere you can grab the link - this can be your blog, Instagram, a Flickr account - anything that allows you to have a URL or website location to link up.
We, of course, encourage you to use your favorite Hero Arts products. But any and all entries are eligible for consideration. We really care most about you bringing a little inky joy into your life. From here on out, our challenges will run for 2 weeks (or more, on occasion). Entries must be submitted by Thursday, May 28 at 5:00pm PT to be eligible for the giveaway, and the winner will be announced when we announce our new challenge on Friday, May 29. Scroll down below the product thumbnails to find the linkup! If you share your project on social media, we'd love if you'd use the #staycraftywithhero hashtag.
Last week's challenge was Essential Workers - a big thanks to everyone who played along, and spread a bit of kindness in your community! Our random winner is Lee Ann Barrett, who created some "teal appreciation" for her grocery store worker, featuring a beautifully colored Antique Rose Stem.

Congratulations Lee Ann! Email us at info@heroarts.com with "Stay Crafty Challenge Winner" in the subject to claim your prize.
Here's to connection, creativity, inspiration, and kindness. ❤

|








Enter our contest by linking your project below! Please enter your name in the caption area. By linking your project, you are giving us permission to feature your card on our blog, social media or newsletter, crediting you as the artist.
























































































