


Posted by Spellbinders Team
on May 20, 2024

Hello Everyone! Jenn Shurkus here and I’m wicked excited to be on the Spellbinders blog as a guest designer. Today I’m sharing some creative cards using this fun collection called House Mouse Summer Fun. I have been cardmaking for a long time, and House Mouse are some of the first wood-mounted stamps I owned. I just love that we can get them in red rubber cling form from Spellbinders now.
Hopefully, these cards will give you some inspiration of some simple things you can do to jazz up your one-layer cards!
Each of these cards are one-layer cards, the only thing popped up off of them is the sentiment strips. I like to be creative and add fun details and dimension to one-layer cards to “jazz” them up.
For all of these cards I heat embossed the images onto watercolor cardstock. I like to use a Versafine Onyx Black ink pad, and a Misti stamping platform to be able to stamp the image several times, and then quickly put on some clear embossing powder. This gives a nice clear black embossed line. I also white embossed all of the sentiments onto black cardstock. I like to use a white pigment ink pad, also stamping the sentiments a few times using a Misti stamping platform, then white embossing powder.
Whenever I do ANY embossing, I prep the surface using the Cottontail Embossing Powder Tool.
I then proceeded to watercolor each of the images with Distress Watercolor Pencils. Since I clear embossed the images, that built up a little “wall” to hold in the watercolor pigment. This makes watercoloring that much easier.
Now let me go through each of the cards and share what I did on each one of them to “jazz” them up a bit.
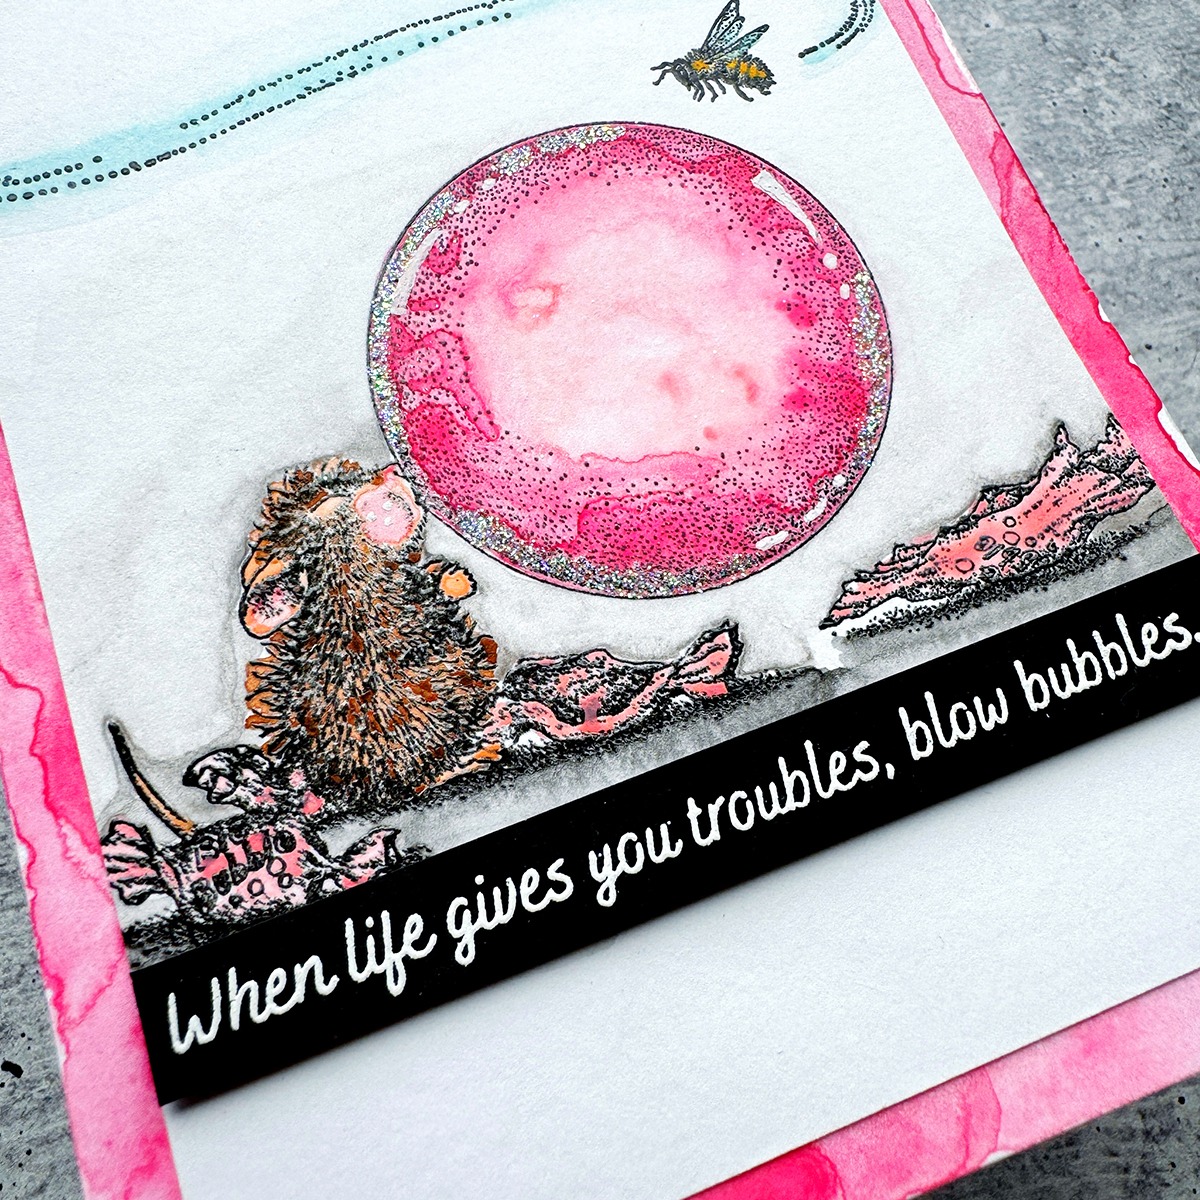
 For this card, to add some dimension, I added some gray watercolor around the edges of the scene to create some depth. I also added some white gel pen details to the large bubble, and the cheek of the mouse. I also trimmed down the main panel, and mimicked the pink watercoloring from the bubble gum to the edges of the card front. Lastly, I added some ultra fine glitter to the edges of the bubble for a little sparkle.

 For this card, to add some dimension I used the same blue watercolor pencil I watercolored the water with and splattered a bit around the background. I also added a generous amount of glossy accents to the water splashes.

 On this card, I exaggerated the ground under the fan and mouse in the glass with some gray watercolor. I also added a touch of ultra-fine glitter to the wind the fan is creating. Lastly, I added two layers of a generous amount of glossy accents to the ice cubes. I added on one layer, let it dry, and then added another on top.

 For this last card, I watercolored a soft blue around the edges of the scene. I also created some colored drips from the ground the mouse and the cake are on, down the card. To do this I would create a clear water drip, then loaded up my paint brush with pigment from the watercolor pencil and touch it to the existing water drip. This is an easy way to control how you want this to look. I added some glossy accents to the candles. Once that was dry I added some ultra-fine glitter to the edge of the candles and the watercolored drips. I also added some glitter to the detail on the birthday hat.
 All of these simple embellishments and watercolor techniques are a fun way to jazz up your one-layer cards. I hope they have inspired you and you use the ideas on your next one-layer cards! Thank you for joining me today!

Blow Bubbles
 For this card, to add some dimension, I added some gray watercolor around the edges of the scene to create some depth. I also added some white gel pen details to the large bubble, and the cheek of the mouse. I also trimmed down the main panel, and mimicked the pink watercoloring from the bubble gum to the edges of the card front. Lastly, I added some ultra fine glitter to the edges of the bubble for a little sparkle.
Summer Is In The Air
 For this card, to add some dimension I used the same blue watercolor pencil I watercolored the water with and splattered a bit around the background. I also added a generous amount of glossy accents to the water splashes.

Take Time To Just Chill
 On this card, I exaggerated the ground under the fan and mouse in the glass with some gray watercolor. I also added a touch of ultra-fine glitter to the wind the fan is creating. Lastly, I added two layers of a generous amount of glossy accents to the ice cubes. I added on one layer, let it dry, and then added another on top.

You’re Never Too Old For Birthday Cake
 For this last card, I watercolored a soft blue around the edges of the scene. I also created some colored drips from the ground the mouse and the cake are on, down the card. To do this I would create a clear water drip, then loaded up my paint brush with pigment from the watercolor pencil and touch it to the existing water drip. This is an easy way to control how you want this to look. I added some glossy accents to the candles. Once that was dry I added some ultra-fine glitter to the edge of the candles and the watercolored drips. I also added some glitter to the detail on the birthday hat.
 All of these simple embellishments and watercolor techniques are a fun way to jazz up your one-layer cards. I hope they have inspired you and you use the ideas on your next one-layer cards! Thank you for joining me today!
Spellbinders Supplies:























































































4 comments
Gorgeous cards
Jenn, as a Massachusettes native, I always giggle at your use of “wicked!”
Love your work, I lived on Cape Cod for 53 years, but born & brought up in boston.
Very cute cards. I love your tips for jazzing up the cards.
Beautiful cards!