
Video: Poinsettia Flowers Background - No Coloring Needed - Hero Arts
on November 28, 2022

Video: Poinsettia Flowers Background - No Coloring Needed

Hey crafty friends! This is Mindy with you today to share inspiration using the Poinsettia Flowers Bold Prints background stamp. I also have a video tutorial that you can view down below or HERE on the Hero Arts YouTube channel.

While this background is beautiful for coloring or ink blending, I'm going to show you a quick and easy way to use it on your holiday cards.

I start the card by stamping the background in Intensified Black ink onto Deluxe Smooth White cardstock. This background could seem a bit overwhelming when stamped in black so I have a trick for you!

We are going to break up the background a little by adding strips of cardstock. This also gives the eye a place to rest. The colors I'm using are Peony , Cherry , Cranberry , Shamrock , Meadow and Kiwi . I'm trimming these down to 1/4" strips and will adhere them to thin cardstock or copy paper using my Precision Glue .

I'll trim off the excess white cardstock and adhere this panel to my stamped card front using the Precision Glue once again. I originally planned to have this going straight across the panel but decided it would be fun to put it on an angle.
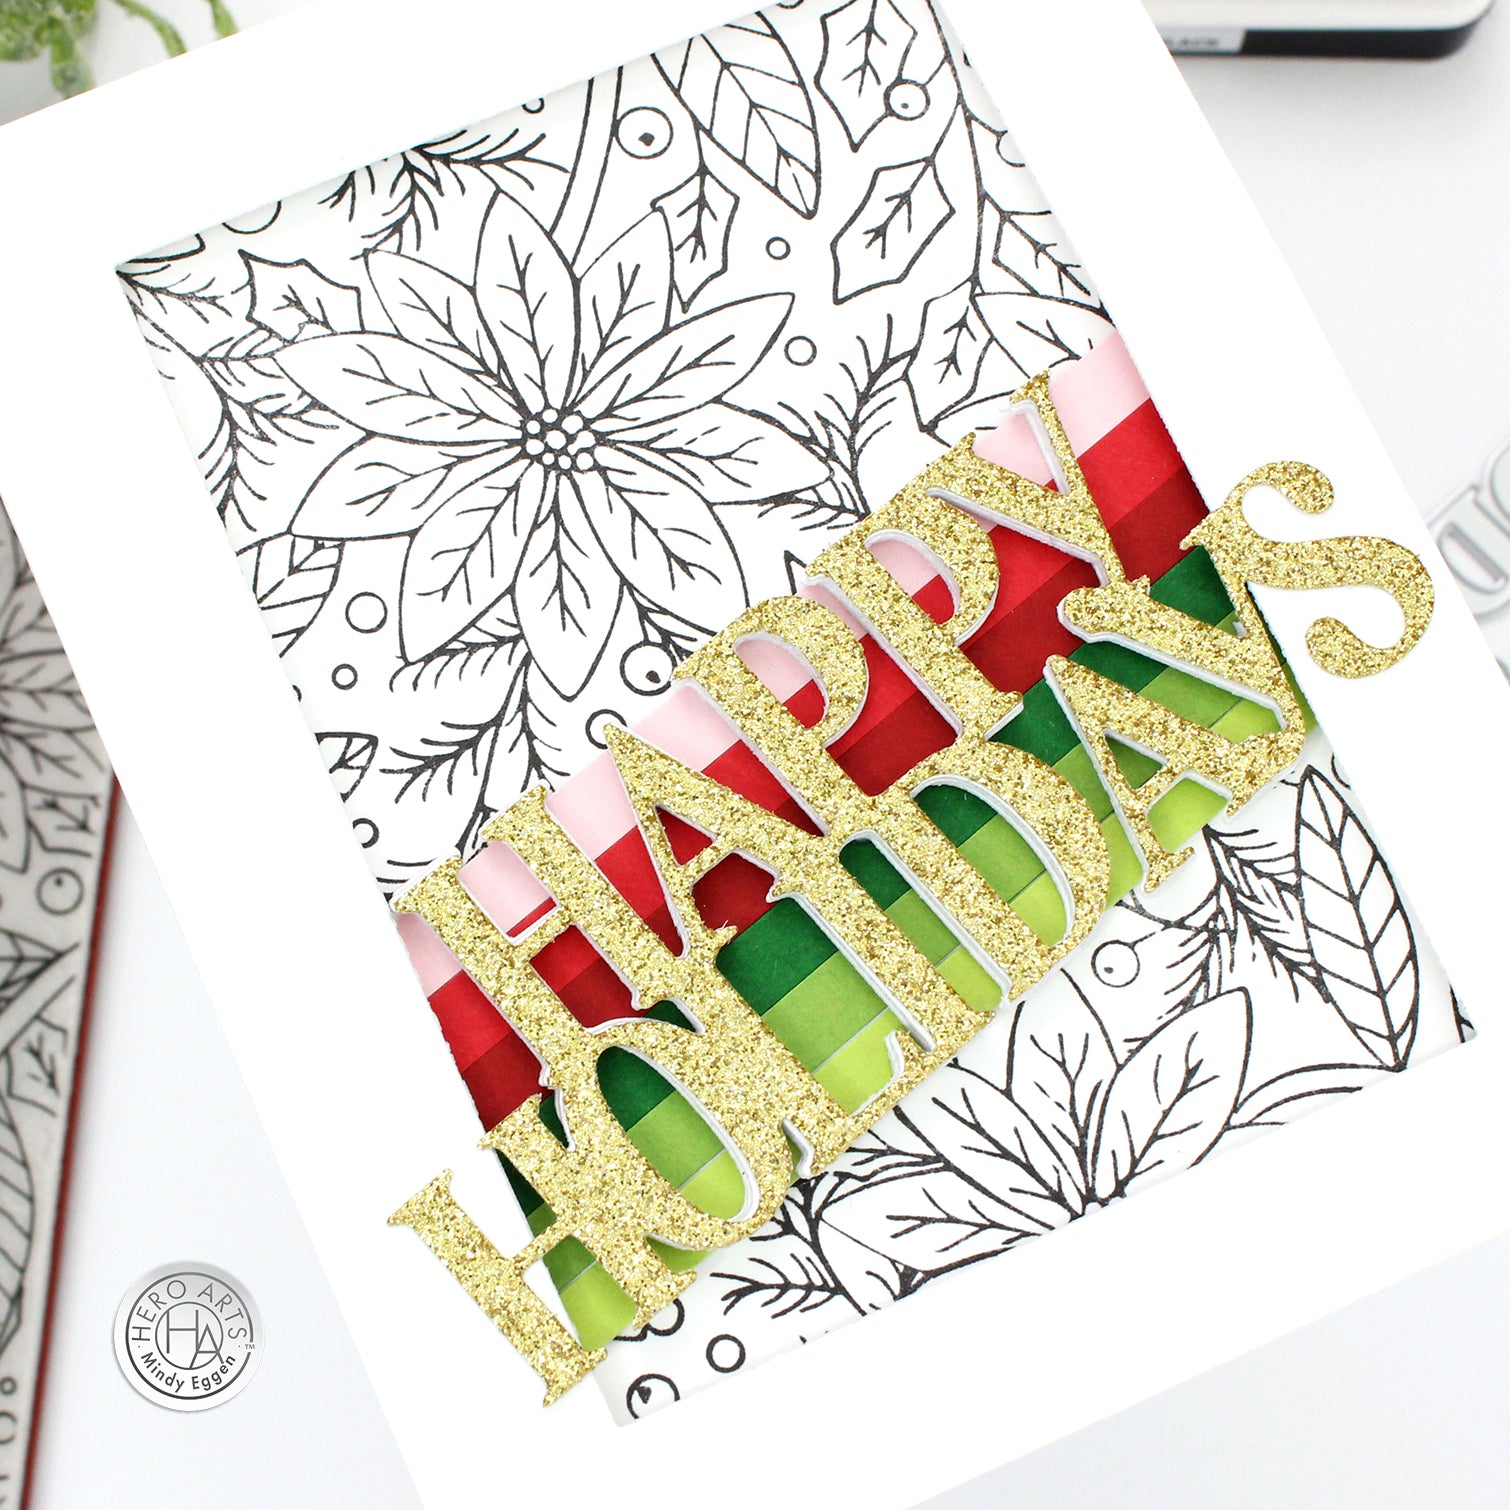
Next, I added a border. I created my border using the Nested Rectangle Infinity Die and Deluxe White cardstock. I added foam tape behind my border and adhered it to the card front.

Now comes the sentiment which I'll admit took me a while to decide on. A thin strip sentiment didn't seem like enough so I dug through my stash and found the Christmas Holidays Stamp & Cut XL which had this large Happy Holidays that happened to fit perfectly across the card.

I added 4-5 layers of white cardstock behind my sentiment to stack it up and make it flush with my white border. The top layer I created with Gold Glitter Pape r because why not add some sparkle? Then I added this right over the top of my colored strips. I obviously didn't plan it this way, but the height of the sentiment matched my strips perfectly!

I'm pretty excited with how this turned out and now that I have an example to go off of, I can mass produce these.

Hope you enjoyed today's inspiration!

Click on products to shop:
CG887 Poinsettia Flowers Bold Prints...
DC288 Christmas Holidays Stamp & Cut...
DI198 Nesting Rectangle Infinity Dies...
AF435 Intens-ified Black Ink Pad |...
PS782 Deluxe Smooth White Cardstock...
PS300 Hero Hues Premium Cardstock...
PS303 Hero Hues Premium Cardstock...
PS302 Hero Hues Premium Cardstock...
PS308 Hero Hues Premium Cardstock...
PS328 Hero Hues Premium Cardstock...
PS340 Hero Hues Premium Cardstock...
PS778 Glitter Paper Holiday Sparkle |...
GW101 Precision Glue | Hero Arts

Leave a comment

Your email will not be published. Please note, comments need to be approved before they are published.


  • How to Make a Stitched Christmas Ornament Card, S3-584, S3-585, E3D-042, SDS-235

    Categories:Die Cutting

    How to Make a Stitched Christmas Ornament Card

    Create a festive Christmas card featuring a stitched ornament, elegant layered die cuts, shimmering gold accents, and an embossed snowflake background. In this step-by-step tutorial, you'll learn how to stitch directly onto cardstock, create dimensional die-cut embellishments, add heat-embossed sentiments, and assemble a polished holiday card. This project is perfect for cardmakers who would like to try stitching on cardstock for the first time. The...

  • How to Create a Simple Foiled Floral Card with Copic Markers, BP-351, BP-374, S5-526

    BP-351

    How to Create a Simple Foiled Floral Card with Copic Markers

    Create an elegant floral greeting card featuring hot foiling, vibrant Copic coloring, and a unique shaped card base. In this step-by-step tutorial, you'll learn how to foil detailed floral images, add dimension and color with alcohol markers, create a shaped arch card, and finish the design with a coordinating foiled sentiment and embellishments. This project is perfect for cardmakers who want to expand their hot...

  • How to Make a Christmas Snow Globe Card: Step-by-Step Holiday Truck Tutorial, S4-1576, S6-222, BP-378

    BP-001

    How to Make a Christmas Snow Globe Card: Step-by-Step Holiday Truck Tutorial

    Introduction Create a festive Christmas snow globe card featuring a holiday truck, decorated presents, snowy trees, dimensional layers, and a textured winter background. In this step-by-step tutorial, you'll learn how to build an intricate die-cut scene, assemble layered holiday elements, create depth with foam adhesive, and use embossing for added texture. This project is perfect for cardmakers who enjoy scene building and layered die-cut designs....