Paper Pieced Peacock - Hero Arts
on July 12, 2022

Paper Pieced Peacock

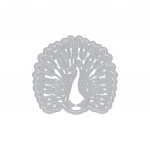
Hi everyone! Ilina here! Recently I have fallen in love with die cutting and having my card's focal point be a die cut element. The new Peacock Fancy Die is perfect for this.

To make the card start by die cutting the peacock and the frame (positioned together) from Bermuda, Paradise, and Kiwi cardstock. Next only die cut the frame from Paradise cardstock.

You will use the the Kiwi piece as the base for your peacock. Cut the body of the peacock from the Bermuda peacock. Using blue marker, color the sides of the body and then cut them out. Adhere to the kiwi colored peacock die cut. Add details using a white gel pen.

Using blue and green markers, color the feathers. Cut out the centers of the feathers from the Paradise and Bermuda peacock die cuts and adhere to the center of the colored feathers. Add details using white gel pen and black pen.

Adhere the paper pieced peacock to the Paradise base and lift the feathers up to reveal the blue underneath for more interest.

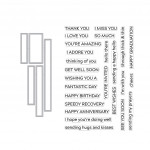
Stamp Thinking of You from the Message Strips Stamp & Cut XL set on Pitch Black cardstock and emboss in white. Die cut with the coordinating die. Set aside.

Stamp Abstract Ceiling Pattern Bold Prints using Contour ink on Deluxe Smooth White cardstock. Cut to 4" x 5 1/4". Adhere the Peacock using foam tape and then adhere the sentiment. Add the entire panel to a Sand Side Folded Card.

Thank you so much for stopping by. Hope you have an amazing day!

Click on products to shop:
DF071 Peacock Fancy Die (C)
HA ]
DC286 Message Strips Stamp & Cut XL
HA ]
CG881 Abstract Ceiling Pattern Bold...
HA ]
AF468 Contour Ink Pad - Hero Arts
HA ]
AF419 Clear Embossing & Watermark Ink...
HA ]
PW110 White Embossing Powder - Hero Arts
HA ]
PS312 Hero Hues Premium Cardstock...
HA ]
PS332 Hero Hues Special Cardstock...
HA ]
PS308 Hero Hues Premium Cardstock...
HA ]
PS323 Hero Hues Premium Cardstock...
HA ]
PS407 Hero Hues Sand Side Folded...
HA ]
PS782 Deluxe Smooth White Cardstock...
HA ]

Leave a comment

Your email will not be published. Please note, comments need to be approved before they are published.


  • How to Layer Nesting Circle Dies for Beautiful Christmas Cards, S4-114, S4-293, S4-124, S4-1453, S6-259, BP-312

    BP-312

    How to Layer Nesting Circle Dies for Beautiful Christmas Cards

    Nesting dies are among the most versatile tools in any cardmaker's collection, but combining multiple nesting die sets can create even more intricate and eye-catching designs. In this step-by-step Christmas card tutorial, you'll learn how to layer three different circle die sets to create a detailed focal point, then enhance it with festive stripes, winter foliage, a die-cut bird, and a foiled holiday sentiment. This...

  • Creative Ways to Use Basic Shape Dies for Cardmaking, S4-246, S4-110, S4-904, S4-124, S4-139, S4-114, S4-511, S4-477, S4-293, S5-738, S5-785, STP-300, S4-1452, BP-377, S4-1280

    BP-377

    Creative Ways to Use Basic Shape Dies for Cardmaking

    Basic shape dies are among the most versatile tools in any craft room. While they're often used for simple layering, they can do much more. In this tutorial, you'll learn several creative ways to use circles, rectangles, labels, and ovals to create custom frames, shaped cards, dimensional focal points, and layered backgrounds. These techniques are perfect for cardmakers who want to get more value from...

  • How to Make an Interactive Snowboard Card with a Sliding Character, S5-786, STN-139, S5-785, STP-300, S4-1503, S5-748

    S4-1503

    How to Make an Interactive Snowboard Card with a Sliding Character

    Create a playful interactive winter card featuring a snowboarding fox that slides across a snowy landscape and spins as it moves. In this step-by-step tutorial, you'll learn how to build a layered stenciled background, assemble an adorable winter fox, create a snowboard scene, and incorporate an easy interactive mechanism using Pear Blossom Press Snap 'n Slide discs. This project is perfect for cardmakers who want...