Posted by Hero Arts
on November 05, 2021


Hi crafty friends! It's time for another Stay Crafty With Hero challenge. This month we are challenging you to create Holiday Tags! We'll include all of the details further down this post; but first, here's some gorgeous tag inspiration from Ilina to kick off our newest challenge.
Hi everyone! With the holidays fast approaching it's the perfect time to get a head start on creating some gift tags for all those presents. I thought the new Color Layering Merry Christmas paired with the Ornaments Infinity Dies was a perfect combination for some holiday tags. I created set of tags using different color combinations, traditional and not traditional.

To make the tags start by stamping the first layer of the Merry Christmas on Dove White cardstock. I stamped both words at the same time since I was using the same color and I used my MISTI to help me line things up and make it easier to stamp the second layers. For the first layer I used the following inks: Pale Tomato dye ink and the following Reactive inks: Splash, Pool Party, Berry Smoothie and Key Lime Fizz. However, you can use any colors of your choice.

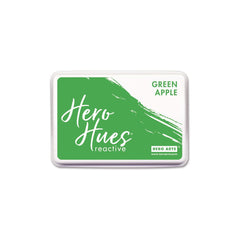
Once you have the first layers stamped, you can move to stamping the second layer. Once again, I used my MISTI tool to line up the stamps and make the mass production of the tags easier. Once I had the stamps positioned, I stamped the second layer using the following ink pads: Strawberry Bold ink and the following Reactive ink pads: Blue Hawaii, Blue Raspberry, Grape Slush and Green Apple.

Once done use the Nesting Circle Infinity Dies to cut them out. Set them aside. Die cut the second to the largest ornament die from the Ornaments Infinity Dies from the following cardstock colors: Plum, Nautical, Cherry, Kiwi and Paradise. Die cut the tops from Silver Glitter paper (die cut two for each tag; one you will adhere on the back to give the tags more finished look).

Assemble the ornaments, adhere the stamped circles and tie twine on the top. I die cut extra circles from Dove White cardstock to add to the stamped circles to create more dimension and add some weight to the tags. I used colors of twine to match the tag colors from my stash, you can use any color of your choice.

And to stretch your supplies even more, you can turn these to ornaments, you can add another stamped circle on the back and another die cut ornament or stack few to add weight so it hangs nicely on the tree.

And now it's your turn to create holiday tags for our challenge! Use the InLinkz tool at the very bottom of this post to link up your card, and you will be entered into our drawing. We will be giving a $50 gift certificate randomly to one person who plays along! To link up your project, you need to share it publicly somewhere you can grab the link – this can be your blog, Instagram, a Flickr account – anything that allows you to have a URL or website location to link up.
We, of course, always encourage you to use your favorite Hero Arts products. But any and all entries are eligible for consideration. We really care most about you bringing a little crafty joy into your life. Entries must be submitted by Thursday, December 9th at 5:00pm PT to be eligible for the giveaway, and the winner will be announced when we announce our new challenge on Friday, December 10th. Scroll down below the product thumbnails to find the linkup! If you share your project on social media, we'd love if you'd use the #staycraftywithhero hashtag.
Last month we challenged you to create cards with fall colors and your entries were simply stunning!! Our random winner is Erica C. We love your abstract fall scene with our Forest Shapes Bold Prints stamp!

Congratulations Erica! Email us at info@heroarts.com with "Stay Crafty Challenge Winner" in the subject to claim your prize.
Here's to connection, creativity, inspiration, and kindness. ❤

Click on products to shop:
|