Posted by Jayne Nelson
on June 23, 2021

Have you tried any of the new Looking Glass Die sets yet? Looking Glass Dies are designed to build small, layered scenes by cutting windows and backgrounds from cardstock. Although these sets can easily be interchanged, today I’m only using the three dies from the beautiful Looking Glass Windmill Tulips set to create the focal points for my two cards. This Dutch inspired die set includes a charming windmill and two sets of blooming tulips.

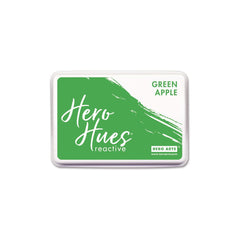
To make my first card, I started by masking the lower half of a trimmed panel of Dove White cardstock. Then, I positioned and secured the Sun Background Stencil over the panel, placing the covered, center circle partially above the masked edge. Using Green Apple, Lemon Drop, Creamsicle, and Taffy Reactive Inks, I inked over the stencil using the wonderful, new Ink Blending Brushes. Before removing the stencil, I splattered the ink with water from a small brush.
Next, I cut a square frame from this background by simultaneously die cutting two, nested Square Infinity Dies. I set this frame aside to use later with the layered windmill scene. I also cut an identical frame from white cardstock. I positioned the white frame into the background panel where I had cut and removed the inked frame earlier. To hold the pieces in place, I applied tape to the backside of the panel.

To make the layered windmill scene, I used each of the Looking Glass Windmill Tulips dies to cut three windows from white cardstock. After cutting each window, I used the same Square Infinity Die, that I used earlier, to cut around each die cut window, creating narrow, square frames. After coloring the windmill and flower layers with ink and blending brushes, it was easy to secure each layer of the scene together and to the card with Precision Glue. To finish the layered scene, I secured the inked frame from the background panel to the top.
To finish the card, I stamped one of the lovely script sentiments from the Succulent Bouquet set below the window. Just for fun, I used a needle and embroidery floss to sew a few stitches below the sentiment. I simply pierced the cardstock along a straightedge ruler with the needle tip and then sewed through the holes with a running stitch. Finally, I added a single Sunset Enamel Dot to the center of the windmill and secured the finished panel to a Kiwi card base.

While I had my supplies out, I made a second card. Much like my first card, I started by masking the lower half of a trimmed panel of white cardstock. However, for this card, I decided to ink the entire upper portion of the card rather than use a stencil. Before inking the panel, I used a Nesting Circle Infinity Die to cut a circle from masking paper that I placed partially above the masked edge to create a white semi-circle behind the windmill.

After blending the same four Reactive Inks onto the background, I duplicated the rest of my first card. I finished the card with a different sentiment from the Succulent Bouquet set and then secured the completed panel to a Dove White Side Folded Card.

There are so many ways to use Looking Glass Dies, I hope that you’ll explore them all. Used individually, as a set or even mixed, all are equally delightful. Thanks so much for stopping by today. Wishing you a wonderful, crafty week!

Click on products to shop:
|