Happy Labor Day, crafty friends! Our offices are closed on Monday, Sept. 7. Support returns Tuesday, Sept. 8. Until then, stay crafty!
20% off Sitewide*
20% off Sitewide*
20% off Sitewide*
20% off Sitewide*
20% off Sitewide*
20% off Sitewide*
20% off Sitewide*
20% off Sitewide*
20% off Sitewide*
20% off Sitewide*
Item added to your cart
Shop by
Posted by Yana Smakula on May 10, 2019
Video: Hot Foil Resist and Watercolor with Flower Pattern Glimmer Hot Foil Plate & ColorSticks by Jane Davenport
Hello, Spellbinders' fans! I'm Yana Smakula, a creative designer at Spellbinders, in this video I’m sharing a hot foil and watercolor project using some of our newest products.
For my project today I decided to combine two awesome techniques - Hot Foiling & Watercolor. Foil, once applied to the paper, creates a resist effect. You can blend ink over it, spray your background with colorful spray inks or watercolor over for a gorgeous, one of a kind look.
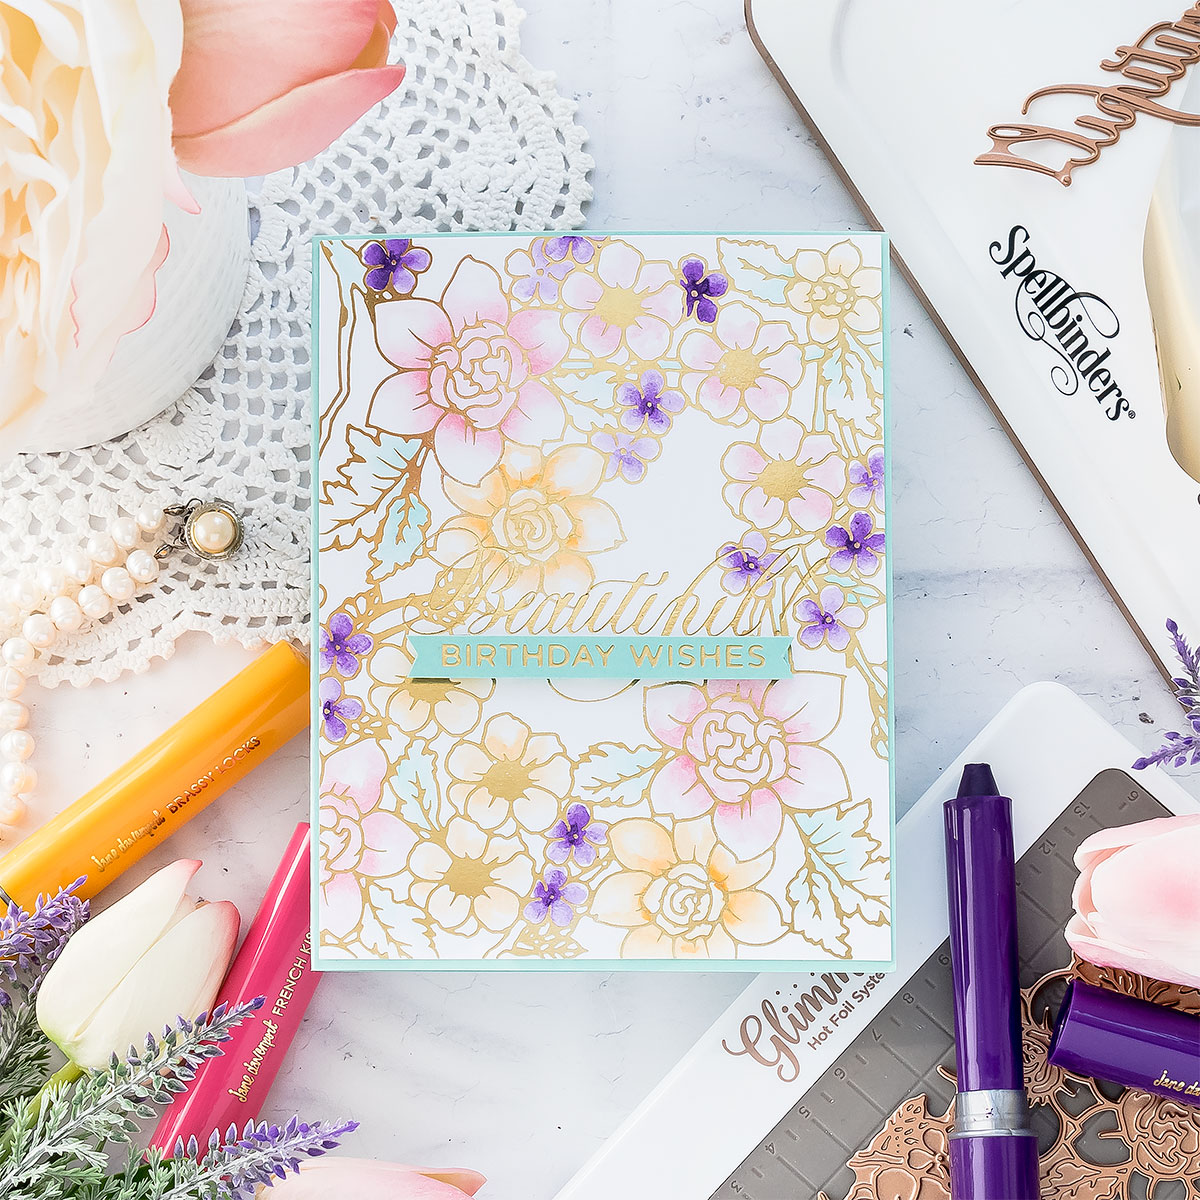
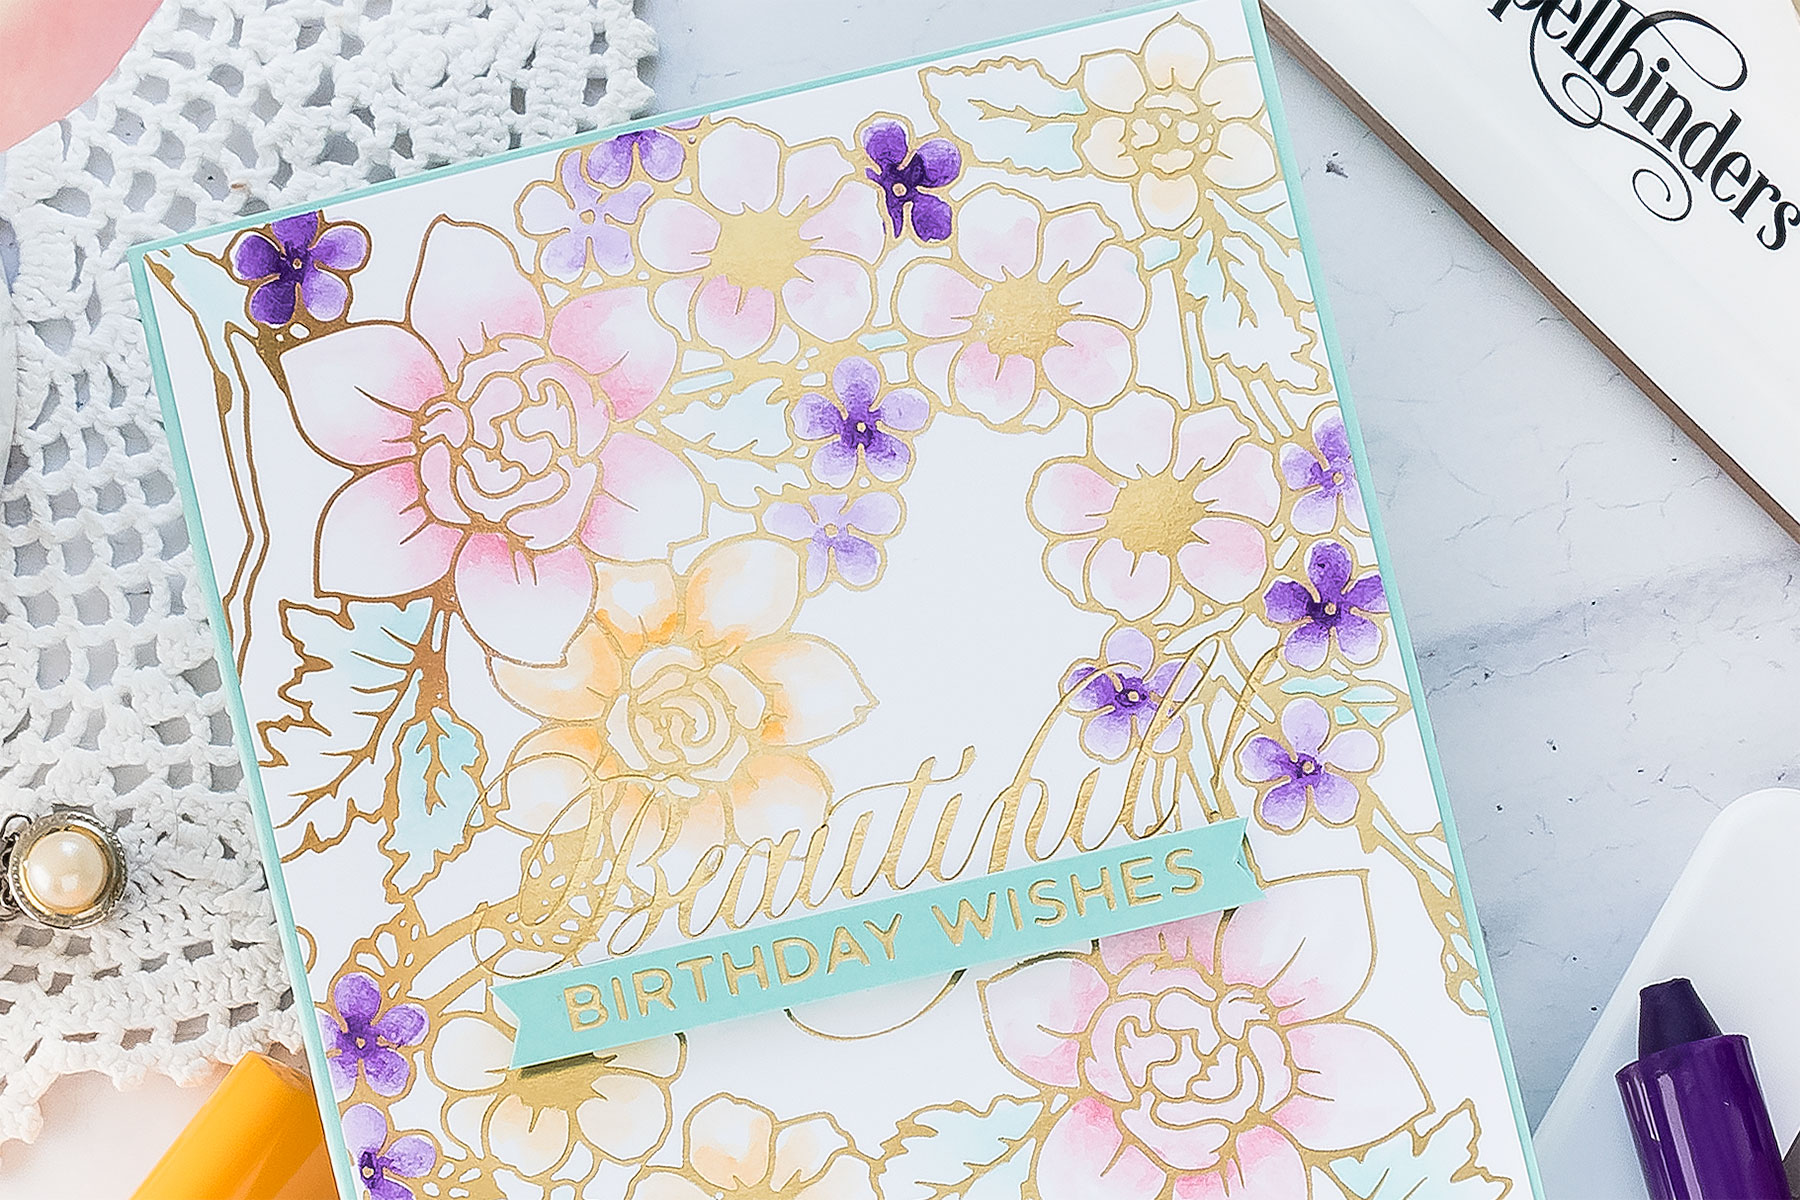
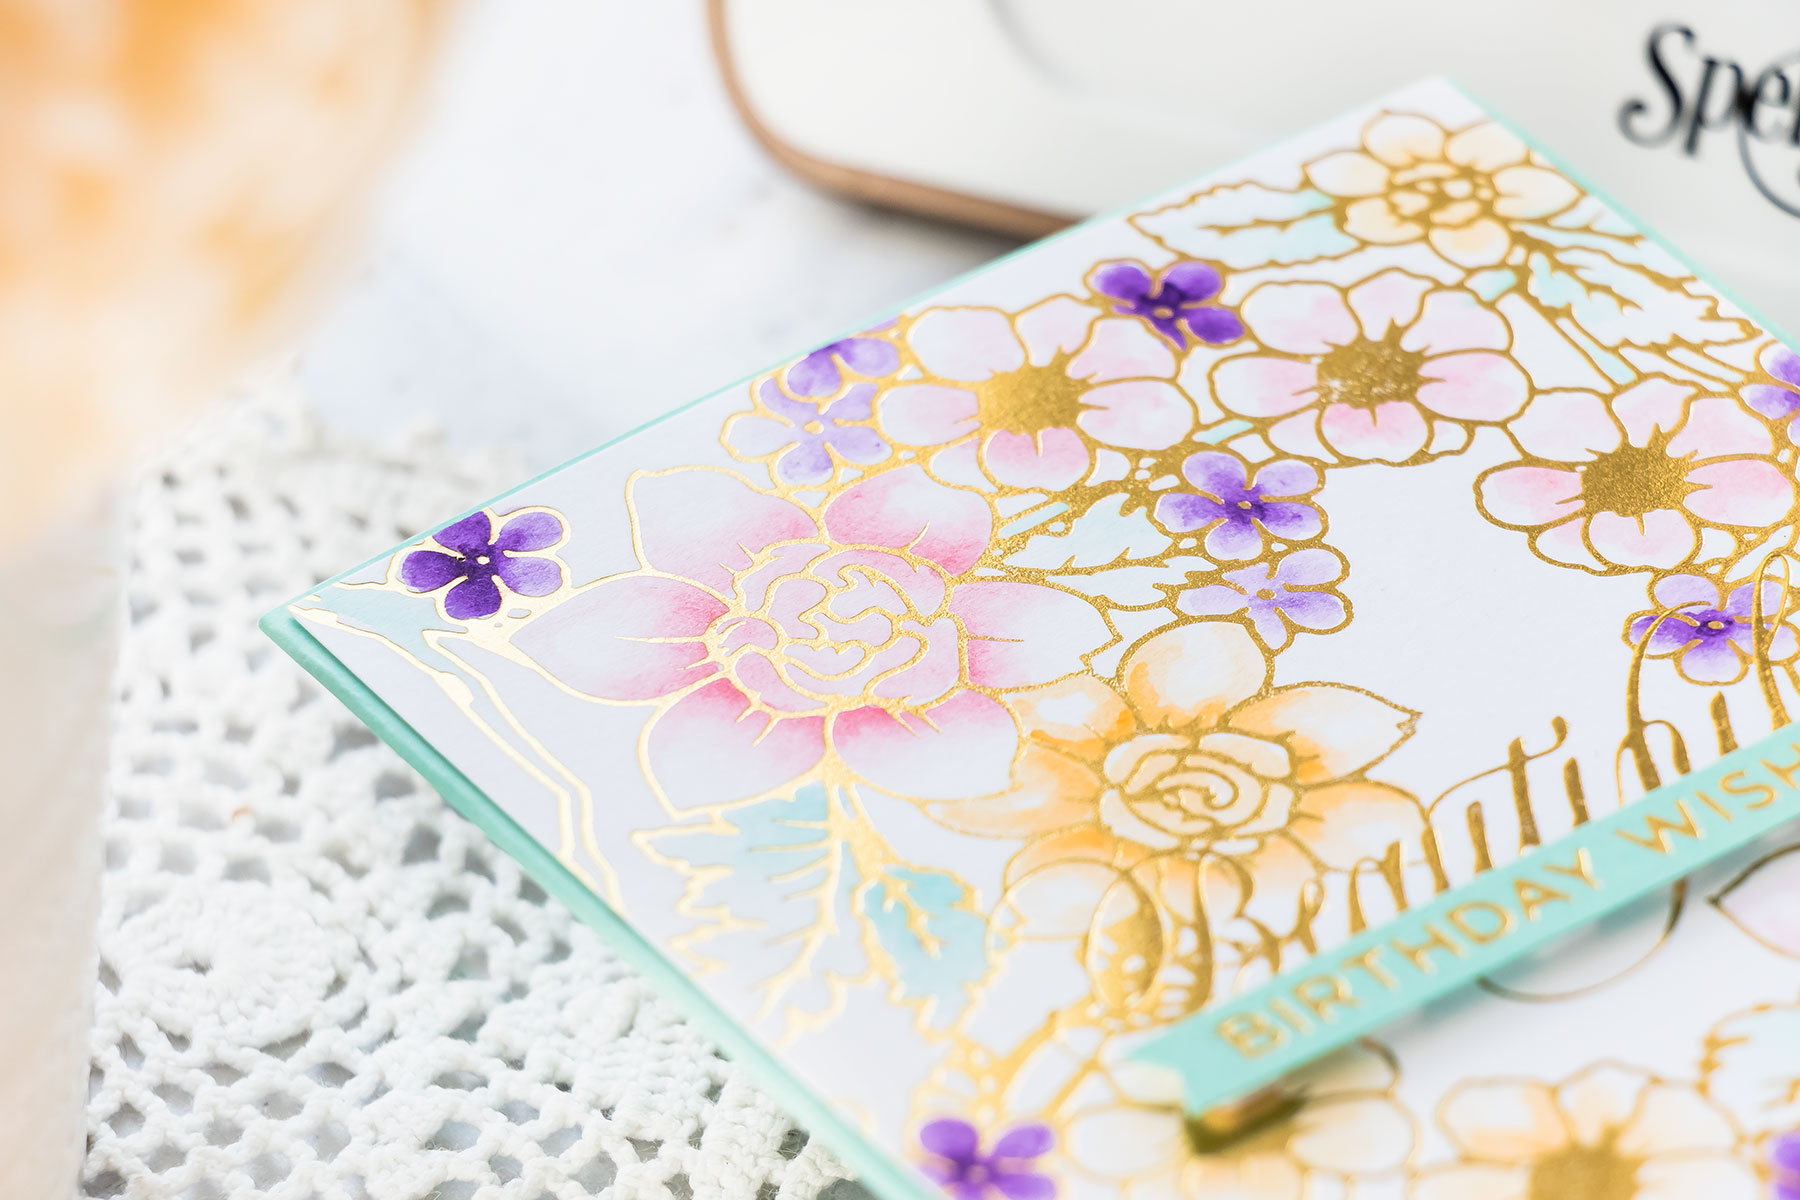
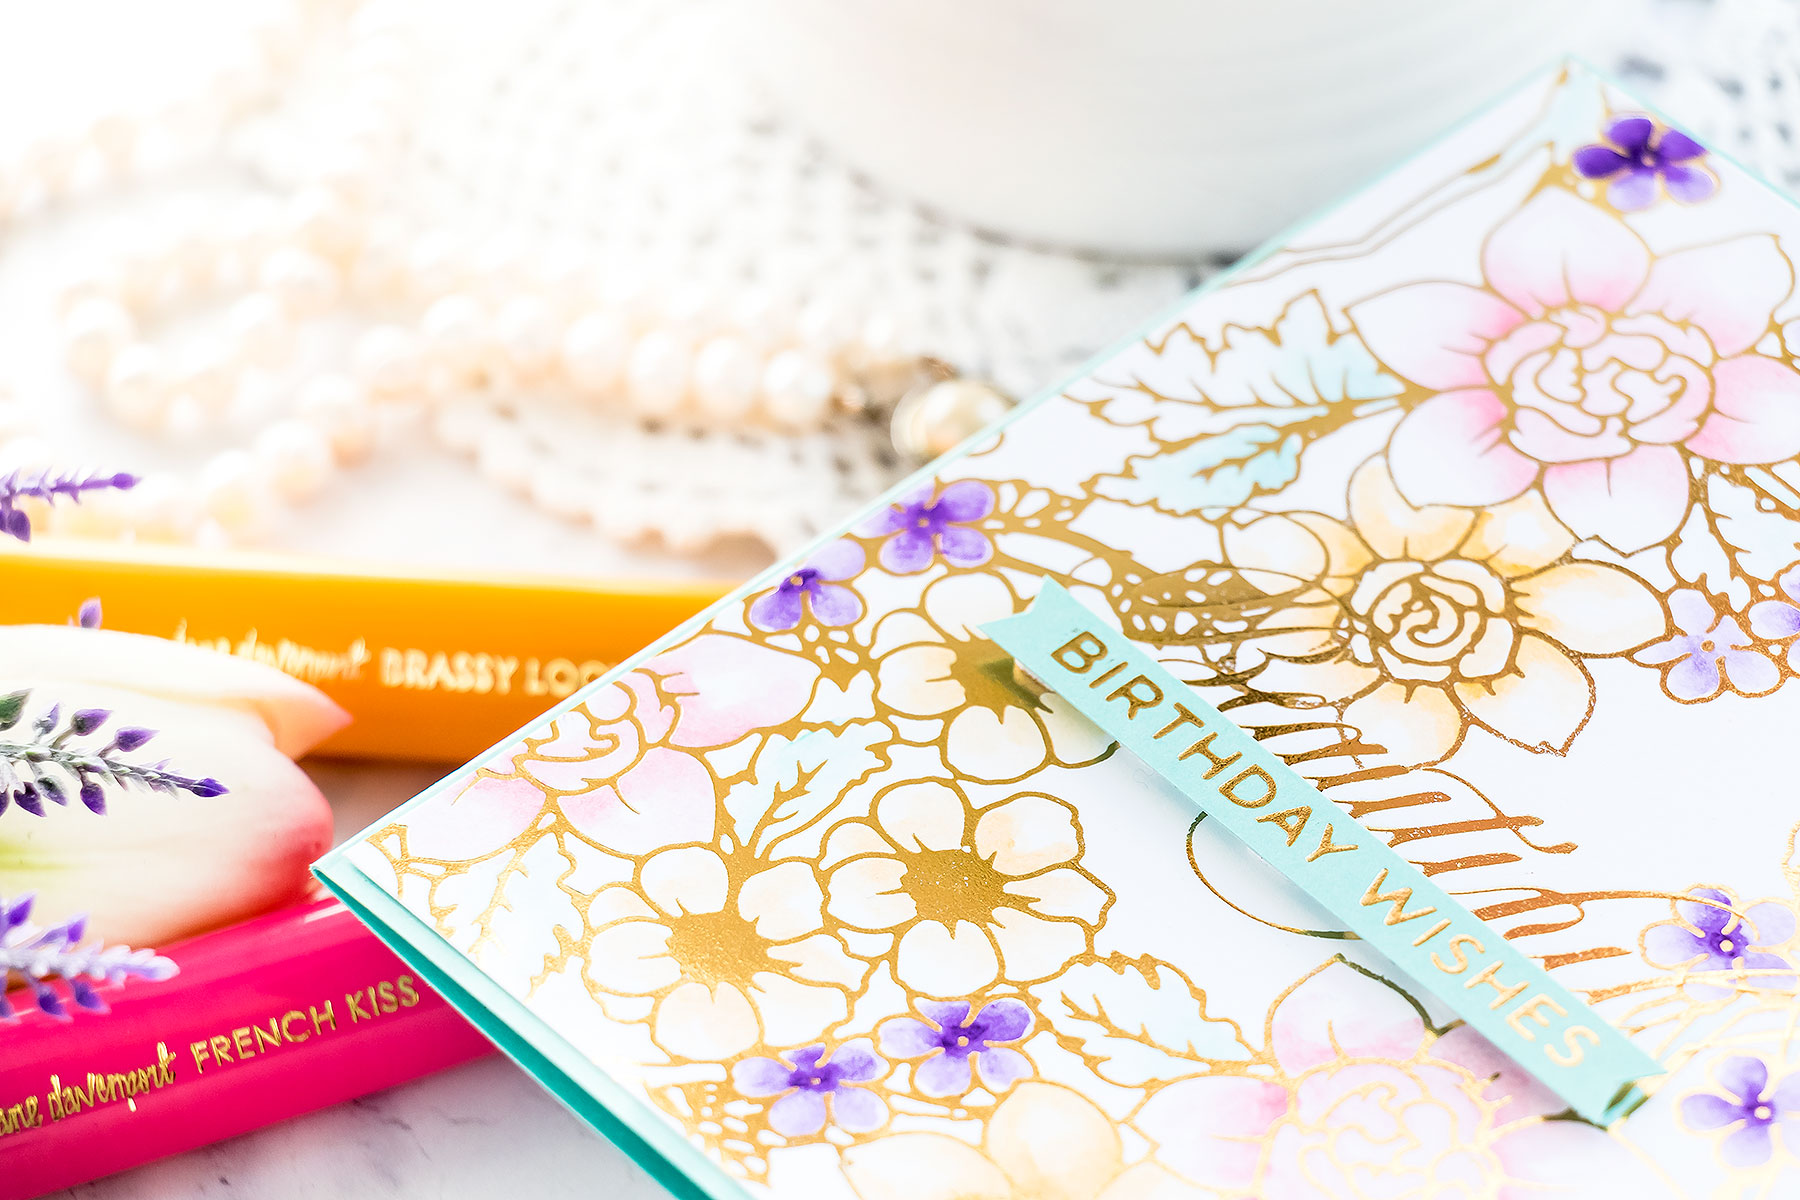
To begin, I foiled
Flower Pattern Glimmer Hot Foil Plate
in
Polished Brass foil
on
white card stock
. Next, I picked several colors of
Jane Davenport ColorSticks
to watercolor my piece with.
ColorSticks are very creamy sticks of gorgeous colors that you can use for mixed media projects, journals, and also for your handmade cards. You can color with these directly on paper or use a water brush to pick up the color and apply it onto the paper for a lighter look.
I used ColorSticks in French Kiss, Brassy Looks, Violet Eyes, and Aquamarine.
I used regular card stock for this piece, not watercolor paper. You certainly can foil on watercolor paper, it is best to use smooth paper or hot pressed paper for best results. I would not recommend using cold pressed watercolor paper as it has texture and the texture will prevent you from having a perfect foil transfer.

That being said because I was coloring on regular, non-watercolor paper I was being mindful of how much water I added to the paper. Regular paper can’t take and hold a lot of water without buckling heavily, so make sure you use just a bit of water here when applying colors using the color sticks.
I trimmed my panel to 4 1/8" x 5 3/8” and adhered to a
Cool Pool card base
. Next, I foiled a sentiment directly on my colored panel. I should have foiled it before I adhered the panel to the card base, but regardless, it worked out great in the end.
I picked the Beautiful Hot Foil plate from
Hey Beautiful set by Paul Antonio
and foiled it in same color foil. I finished this card by adding a “
Birthday Wishes
” sentiment foiled on the same Cool Pool card stock cut to a thin strip and foam mounted on a card.
VIDEO TUTORIAL
Watch the video tutorial below or on
YouTube
to learn how to make this project:
Hi, crafty friends! Lisa Tilson here, and I'm delighted to be with you today sharing a fun interactive birthday card featuring the new Spellbinders Card Spinners. If you've ever wanted to add movement to your handmade cards without complicated mechanisms, these spinners make it incredibly easy! For today's project, I'm using the Large Card Spinner to create an adorable birthday monster that spins with just a...
Turn layered scalloped frames into a colorful Halloween gallery wall! This step-by-step tutorial shows how to emboss and arrange the Scalloped Frames, assemble the adorable Drac character from Simon Hurley's Halloween Hugs Collection, and create a playful handmade Halloween card full of dimension and color.
Celebrate treasured memories with a handmade vintage journal featuring interactive pages, pockets, vintage photos, and layered embellishments. This step-by-step tutorial showcases creative ideas for building meaningful double-page spreads with Esther Glas' Turn the Page collection.