


Posted by Spellbinders Team
on May 21, 2024

Hello and welcome back to the Spellbinders blog. My name is Joy Wilson I and hope to inspire you to pull out your favorite markers and the new House Mouse red rubber cling stamps that have been introduced this month from the Summer Fun Collection. This collection is so enjoyable because it encompasses our favorite summer pastimes that will take you down memory lane.
 My first card shows the adorable, Sweet Birthday set which I couldn't resist making into a light up card, but as you can see above it looks amazing even when not lit up. When I start my coloring, I always map out my colors and shadow areas to keep it "fresh" in my mind as I color.
 In this case, I mapped out the face, hands and feet with one color and added the shadow area along his back side and around his arms and legs with a warm gray alcohol marker. You can use any alcohol markers you have on hand or you can find the Warm Gray Olo's in the Spellbinders shop. Once the mapping is done, I start with basic blending. For me, I start with my darkest color and move to my next lightest color until I have worked my way through each color family. In this case it was four markers.
 Once you work your way through the colors you get a seamless blend making the "scary" dark not so harsh but giving the image some definition.
I followed the same rules for the cake, leaving a large cast show where the piece had been cut out of the cake. To make the cake look more realistic, I then came in with my darkest 3 colors and stippled in the crumb texture by holding my marker straight up and down and applying fine dots.
Once you work your way through the colors you get a seamless blend making the "scary" dark not so harsh but giving the image some definition.
I followed the same rules for the cake, leaving a large cast show where the piece had been cut out of the cake. To make the cake look more realistic, I then came in with my darkest 3 colors and stippled in the crumb texture by holding my marker straight up and down and applying fine dots.

 I think we can all relate to this scene during the summer! Have you ever opened the refrigerator and stood in front of it trying to cool down? I think this little mouse has the right idea... Stay Cool! I used the exact same methods as the first card, but used less of the darker colors because in theory you can see through glass, ice, and most drinks. To get the transparent effect of the glass, I added shading with a Cool Gray alcohol marker and white streaks using the Spellbinders Splatter White Opaque Watercolor with a fine detail brush. Just one little tip! Do not add your white highlights until you are sure you are done coloring because you can ruin your marker nibs if you color over the white!
 Pop! is probably the most reminiscent of my childhood. I remember chewing bright red bubble gum and hanging out with friends. I don't know why bright red bubble gum and summertime are synonymous in my head, but they are. This little mouse seems to love it and that cute bee wants in on the action too. I paired the Pop! set with a simple stenciled sky. I would suggest using the Background Scapes Stencil and Simon Hurley's Clear Skies ink to create your sky.
 Last, but not least every mouse has to have some Water Fun, while playing with the hose! I'd be the mouse riding the wave!! Even though the mice are darling, because of the colors I chose the hose, and the burst of water are the star of the show. If I had chosen less vibrant colors, then the scene would be more serene. Does that make sense? To finish off this card I added stenciled sun rays using Simon Hurley's Over The Moon ink and clouds from the On Cloud Nine die set. If you are like me and love shimmer and shine, adding a Diamond Stickles is a must to make the water sparkle!
I hope you have enjoyed this little walk through the Summer Fun Collection, and this inspires you to document new memories this year.
Last, but not least every mouse has to have some Water Fun, while playing with the hose! I'd be the mouse riding the wave!! Even though the mice are darling, because of the colors I chose the hose, and the burst of water are the star of the show. If I had chosen less vibrant colors, then the scene would be more serene. Does that make sense? To finish off this card I added stenciled sun rays using Simon Hurley's Over The Moon ink and clouds from the On Cloud Nine die set. If you are like me and love shimmer and shine, adding a Diamond Stickles is a must to make the water sparkle!
I hope you have enjoyed this little walk through the Summer Fun Collection, and this inspires you to document new memories this year.

The Coloring
What I personally love about coloring House Mouse stamps is that the shading is built in for you, taking the guess work out of it. I have heard people say that sometimes they don't know where to start with their coloring because light source, textures, and blending can be intimidating. The opposite is true when the hash marks or shading is put in by the artist. What I mean by this is the shadowed areas are already there for you, so if you are a new colorist, you technically could use just one color and look like a pro. Alternatively, if you are looking for more in-depth coloring, that is what we are going to cover today. We will take a close look at one of four stamps that I colored today, and then you can apply it to the other three. For the sake of continuity in my card set, all cards were colored with the same color families, but the sky is the limit! My first card shows the adorable, Sweet Birthday set which I couldn't resist making into a light up card, but as you can see above it looks amazing even when not lit up. When I start my coloring, I always map out my colors and shadow areas to keep it "fresh" in my mind as I color.
 In this case, I mapped out the face, hands and feet with one color and added the shadow area along his back side and around his arms and legs with a warm gray alcohol marker. You can use any alcohol markers you have on hand or you can find the Warm Gray Olo's in the Spellbinders shop. Once the mapping is done, I start with basic blending. For me, I start with my darkest color and move to my next lightest color until I have worked my way through each color family. In this case it was four markers.
 Once you work your way through the colors you get a seamless blend making the "scary" dark not so harsh but giving the image some definition.
I followed the same rules for the cake, leaving a large cast show where the piece had been cut out of the cake. To make the cake look more realistic, I then came in with my darkest 3 colors and stippled in the crumb texture by holding my marker straight up and down and applying fine dots.
Once you work your way through the colors you get a seamless blend making the "scary" dark not so harsh but giving the image some definition.
I followed the same rules for the cake, leaving a large cast show where the piece had been cut out of the cake. To make the cake look more realistic, I then came in with my darkest 3 colors and stippled in the crumb texture by holding my marker straight up and down and applying fine dots.
The Extra Details
Adding the extra details to a card really makes it feel special, so I stenciled in some stars using Gold Rush Lunar Paste and white gel pen highlights in the darkest areas to make the image pop. I couldn't stop there and had to make it a light up card, by poking holes using the Pinkfresh Studio Dual Tip Embellishment Tool, into the candle "smoke" to create the area for the flame. Since we have three candles, I used the Pear Blossom Press EZ-light which is so simple to use. All you have to do is slide the battery in, tape down the wires and it works! Trust me, if I can do it, you can too!!!
 I think we can all relate to this scene during the summer! Have you ever opened the refrigerator and stood in front of it trying to cool down? I think this little mouse has the right idea... Stay Cool! I used the exact same methods as the first card, but used less of the darker colors because in theory you can see through glass, ice, and most drinks. To get the transparent effect of the glass, I added shading with a Cool Gray alcohol marker and white streaks using the Spellbinders Splatter White Opaque Watercolor with a fine detail brush. Just one little tip! Do not add your white highlights until you are sure you are done coloring because you can ruin your marker nibs if you color over the white!
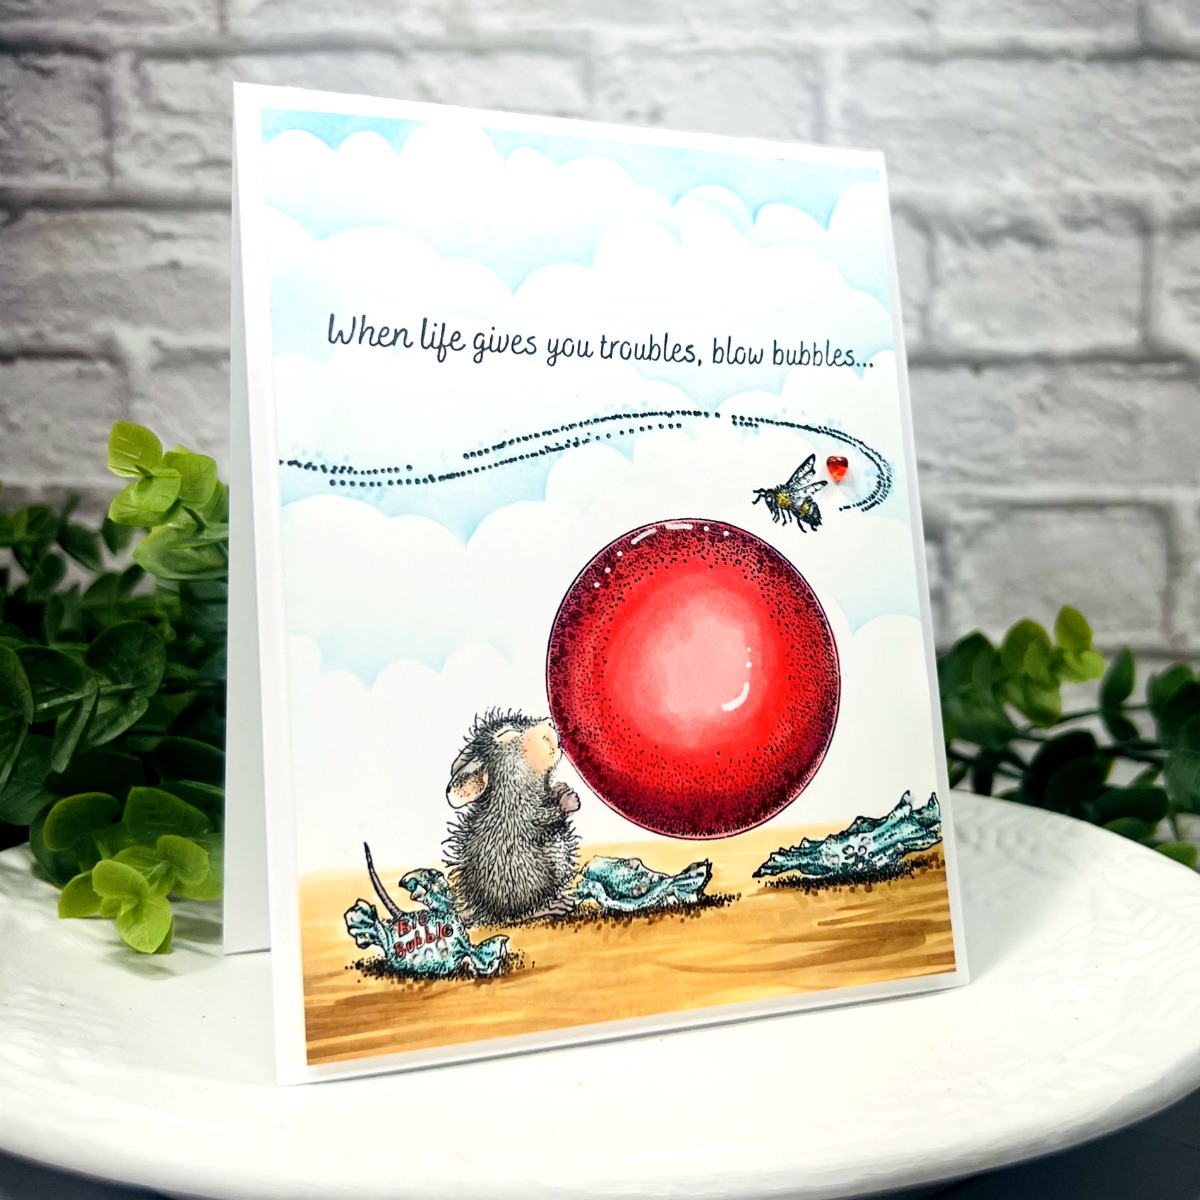 Pop! is probably the most reminiscent of my childhood. I remember chewing bright red bubble gum and hanging out with friends. I don't know why bright red bubble gum and summertime are synonymous in my head, but they are. This little mouse seems to love it and that cute bee wants in on the action too. I paired the Pop! set with a simple stenciled sky. I would suggest using the Background Scapes Stencil and Simon Hurley's Clear Skies ink to create your sky.
 Last, but not least every mouse has to have some Water Fun, while playing with the hose! I'd be the mouse riding the wave!! Even though the mice are darling, because of the colors I chose the hose, and the burst of water are the star of the show. If I had chosen less vibrant colors, then the scene would be more serene. Does that make sense? To finish off this card I added stenciled sun rays using Simon Hurley's Over The Moon ink and clouds from the On Cloud Nine die set. If you are like me and love shimmer and shine, adding a Diamond Stickles is a must to make the water sparkle!
I hope you have enjoyed this little walk through the Summer Fun Collection, and this inspires you to document new memories this year.
Last, but not least every mouse has to have some Water Fun, while playing with the hose! I'd be the mouse riding the wave!! Even though the mice are darling, because of the colors I chose the hose, and the burst of water are the star of the show. If I had chosen less vibrant colors, then the scene would be more serene. Does that make sense? To finish off this card I added stenciled sun rays using Simon Hurley's Over The Moon ink and clouds from the On Cloud Nine die set. If you are like me and love shimmer and shine, adding a Diamond Stickles is a must to make the water sparkle!
I hope you have enjoyed this little walk through the Summer Fun Collection, and this inspires you to document new memories this year.
Spellbinders Supplies:























































































