


Posted by Spellbinders Team
on June 24, 2024

Hi there, this is Annie Williams and I’m excited to be back on the blog today to share a couple of cute cards made with the new Out and About Collection. The adorable die sets in this collection were all designed to work with the new Scout Mini Diecutting Machine, but I think you’ll see that the smaller cutting platform doesn’t limit your creativity at all! Here I picked some of my favorite die sets from the collection to create three really fun cards that are sure to send a smile.
 Die cut the person out of white, Waterfall, Sunkissed, Cosmic Sky, and Poppy Field Cardstock and the duck out of white, Poppy Field, and Persimmon Cardstock using the Dancin’ In The Rain Die Set. Assemble each figure with liquid glue, leaving the dancing legs separate from the upper body on the person. Die cut the puddle and raindrops out of Glacier Cardstock using the same die set.
 Trim a piece of Raindrop Cardstock to 4” x 5.25” and stamp a greeting from the Sending Sunshine Sentiments Stamp Set onto the bottom of the panel using black ink. Add the panel to a top-folding A2-sized white card base with foam adhesive and adhere the puddle to the card front with liquid glue before adding the person and duck with foam adhesive (attaching the legs with a single small foam square to allow them to move freely). To finish the card off, add the raindrops around the scene with liquid glue.
 Die cut the letters for “thank you” out of white cardstock and blend Candied Apple, Carved Pumpkin, Squeezed Lemonade, Mowed Lawn, Salty Ocean, and Wilted Violet Distress Oxide Inks over the die-cuts in rainbow order with a sponge dauber. Stitch the letters using gold metallic thread and adhere to the base layer cut from Onyx Cardstock using liquid glue.
 Trim a piece of foiled patterned paper from the Bayfair 6x6 Paper Pad to 4” x 5.25” and mat it with Mirror Gold and Onyx Cardstock before adhering to a top-folding A2-sized white card base with tape runner. Pop the sentiment up in the center of the card front with foam adhesive and embellish with Graphite Color Essential Gems.
 Die cut the dog out of white, Onyx, Mirror Silver, Waterfall, and Wild Berry Cardstock using the Roller Disco Dottie Die Set and assemble with liquid glue. Die cut Mirror Silver and Lagoon Cardstock using one of the sentiments from the Hello Smile Die Set and layer together with more liquid glue. Die cut white cardstock using one the Label 6 die from the Arch Label & Tag Die Set (yes, it fits through the Scout Machine with room to spare!) and blend Peacock Feathers and Salvaged Patina Distress Oxide Ink over most of the panel.
 I wanted to create the look of an embossed background for my card, so I die-cut the two large flowers from the Little Blooms Die Set several times out of white cardstock. Then, I glued the die-cuts onto my top-folding A2-sized white card base with liquid glue in a random pattern, trimming off any overhanging bits with scissors. Once complete, I added my arch, sentiment, and doggy onto the card front with foam adhesive.

Dancing in the Rain Card
I couldn’t resist that adorable duck from the Dancin’ In The Rain Die Set, so I started by pulling out some brightly colored cardstock to create this simple and sweet encouragement card for a friend. Die cut the person out of white, Waterfall, Sunkissed, Cosmic Sky, and Poppy Field Cardstock and the duck out of white, Poppy Field, and Persimmon Cardstock using the Dancin’ In The Rain Die Set. Assemble each figure with liquid glue, leaving the dancing legs separate from the upper body on the person. Die cut the puddle and raindrops out of Glacier Cardstock using the same die set.
 Trim a piece of Raindrop Cardstock to 4” x 5.25” and stamp a greeting from the Sending Sunshine Sentiments Stamp Set onto the bottom of the panel using black ink. Add the panel to a top-folding A2-sized white card base with foam adhesive and adhere the puddle to the card front with liquid glue before adding the person and duck with foam adhesive (attaching the legs with a single small foam square to allow them to move freely). To finish the card off, add the raindrops around the scene with liquid glue.
Stitched Rainbow Thank You Card
I loved the fun font in the Stitched Thank You & For You Die Set and decided to create a rainbow sentiment as a focal point with gold accents for this simple eye-catching thank you card. Die cut the letters for “thank you” out of white cardstock and blend Candied Apple, Carved Pumpkin, Squeezed Lemonade, Mowed Lawn, Salty Ocean, and Wilted Violet Distress Oxide Inks over the die-cuts in rainbow order with a sponge dauber. Stitch the letters using gold metallic thread and adhere to the base layer cut from Onyx Cardstock using liquid glue.
 Trim a piece of foiled patterned paper from the Bayfair 6x6 Paper Pad to 4” x 5.25” and mat it with Mirror Gold and Onyx Cardstock before adhering to a top-folding A2-sized white card base with tape runner. Pop the sentiment up in the center of the card front with foam adhesive and embellish with Graphite Color Essential Gems.
Roller Doggie Card
Lastly, I thought the dog from the Roller Disco Dottie Die Set was beyond cute, so I created a fun background for her on this sweet card that is sure to make someone smile. Die cut the dog out of white, Onyx, Mirror Silver, Waterfall, and Wild Berry Cardstock using the Roller Disco Dottie Die Set and assemble with liquid glue. Die cut Mirror Silver and Lagoon Cardstock using one of the sentiments from the Hello Smile Die Set and layer together with more liquid glue. Die cut white cardstock using one the Label 6 die from the Arch Label & Tag Die Set (yes, it fits through the Scout Machine with room to spare!) and blend Peacock Feathers and Salvaged Patina Distress Oxide Ink over most of the panel.
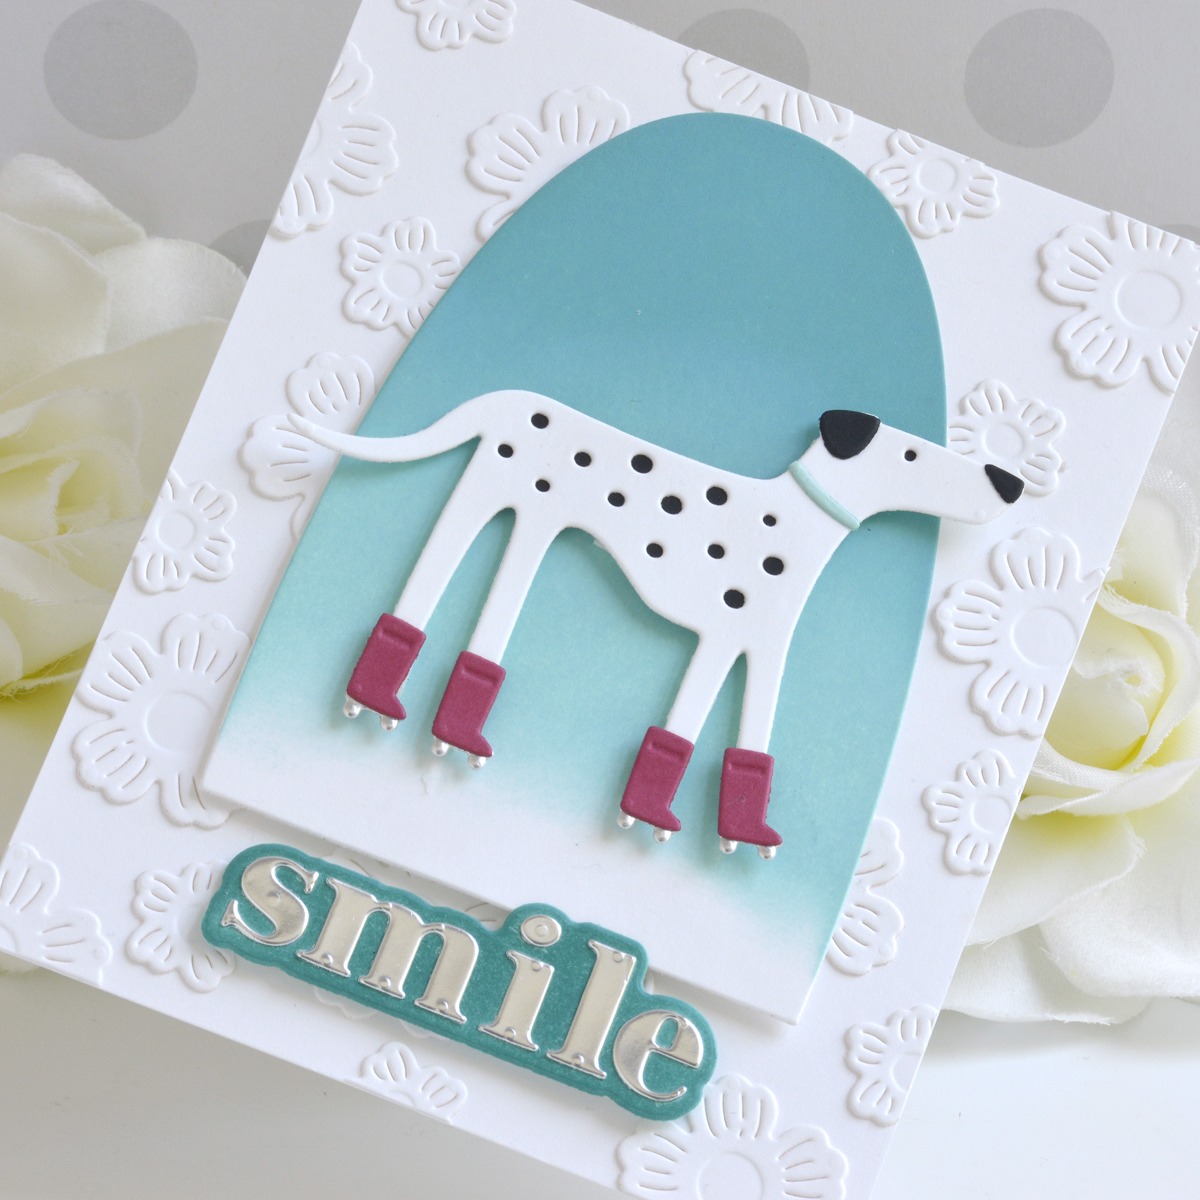 I wanted to create the look of an embossed background for my card, so I die-cut the two large flowers from the Little Blooms Die Set several times out of white cardstock. Then, I glued the die-cuts onto my top-folding A2-sized white card base with liquid glue in a random pattern, trimming off any overhanging bits with scissors. Once complete, I added my arch, sentiment, and doggy onto the card front with foam adhesive.
Spellbinders Supplies:























































































1 comment
I loved all the cards. The simplicity of them makes me realize a simple design can say much!