Posted by Jayne Nelson
on November 11, 2020

Although making and sending holiday cards is a priority right now, I love the idea of stretching holiday themed stamps for all occasions. Today, I’m sharing a pair of non-holiday cards made with the new Holiday Blessings sentiment set and the Christmas Rose Bold Prints stamp.

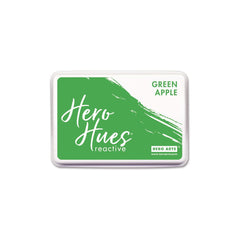
For my first card, I started by stamping the beautiful Christmas Rose Bold Prints background onto a piece of Dove White cardstock with Clear Embossing & Watermark ink. I embossed the design with white embossing powder. Then, I picked four, vibrant Reactive inks - Lemon Drop, Key Lime Fizz, Green Apple, and Blue Raspberry. I used a foam applicator to blend the inks over the embossed panel and a dry paper towel to rub the excess ink from the embossed design. Next, I used a large, Nesting Rectangle Infinity Die to precisely cut a panel for my card. I love how these dies cut crisp, perfect panels every time. I also wrapped the center of the panel with a horizontal strip of vellum that I taped to the back. Then, I secured the panel to the center of a Canary card base with foam tape.

Next, I stamped a message from from the new Holiday Blessings set with Intens-ified Black ink onto a piece of Canary cardstock. The sentiments in this set are composed with script and typewriter fonts and they are gorgeous! Not only am I thrilled to have a lovely Happy New Year stamp, but four of these sentiments can easily be used all year. I die cut the stamped sentiment with a decorative Tag Frame Infinity Die and then secured it to the card with Precision Glue.
To embellish the card, I stamped the Christmas Rose Bold Prints again, also on white cardstock, but this time with black ink. I quickly colored a few flowers by simply inking over them with Lemon Drop and Blue Raspberry ink. Then, I fussy cut around each flower, colored the centers with a white gel pen, and secured them to the card with glue and foam tape. To finish the card, I added a tiny, green heart, that I cut with the smallest Nesting Hearts Infinity Die, below the sentiment. I also added a black bow at the top edge.

While I had my supplies out, I made a second, similar card. For this card, I inked the embossed background with Taffy, Creamsicle, Lemon Drop and Key Lime Fizz. I also wrapped the panel with vellum, but vertically for variety. I secured the panel to a Peony card base.

This time, I stamped two sentiments on strips of Kiwi and Peony cardstock that I secured to the vellum strip. I inked the flowers with Taffy and Creamsicle inks and then positioned the flowers above and below the sentiments on the vellum, trimming the flowers along the panel’s edges. I also added a trio of pink enamel dots for extra interest and finished the card with a black bow along the side fold.
Thanks so much for stopping by today. I hope that you’re inspired to look at your holiday stamps for uses beyond the season. Happy crafting!

|